




Why do all standing desks look so sterile? There are very few standing desks on the market designed to look like a beautiful piece of furniture, and the ones that do come with a ridiculous price tag. So I did what any reasonable person would do, I decided to design and build my own. This is a tutorial on how to build your own DIY standing desk.
Jump To:
Part 1a: The Desktop
Part 1b: Creating the Pill Shape
Part 2: The Edge Frame
Part 3: The Drawer
Part 4a: Base Structure
Part 4b: Base Shell
Part 5a: Base Top Cap
Part 5b: Base Bottom Cap
Part 6: Finished Cabinet
Part 7: Power
Reveal
Materials & Supplies
Wood & Sheet Goods
- 1″ thick red oak boards (for the desktop)
- ¾” solid wood (for the edge frame)
- ¼” oak plywood (for the base shell)
- Standard plywood sheet, any grade (for the internal base ring structure and vertical supports — won’t be visible)
- ½”–¾” solid wood (for the cabinet front)
- Solid wood or plywood + edgebanding (for the top and bottom caps and shelf)
- Scrap plywood (for straightedges, templates, and test cuts)
Hardware & Fasteners
- Wood biscuits (for the desktop glue-up)
- 1.5″ wood screws (for the base internal structure)
- 1¼” screws (for the drawer front)
- 2″ wood screws (for attaching the top cap)
- M6-1.00 x 35mm screws (for reattaching the desk frame foot)
- 12″ drawer slides
- Pocket hole screws
- Cabinet hinges (sized for ½” material, or adjust with a build-up strip)
- Figure-8 fasteners (optional alternative for attaching the top cap)
Other Materials
- Wood glue
- Accelerator glue (glue + spray activator)
- Painter’s tape
- Wood filler
- Cardboard (for templates)
- Steel bar, 2″ wide x ⅛” thick (for base reinforcement)
- Sandpaper: 80 grit and 120 grit
- Stain of your choice (compatible with a 120-grit finish)
- Standing desk frame
Tools
- Table saw
- Circular saw
- Router
- Circle jig
- Router flush-trim bit
- Router straight bit
- Biscuit joiner
- Jigsaw
- Hand planer
- Chisel
- Orbital sander
- Drill + drill bits (including a ½” bit and a metal-specific bit)
- Kreg hinge jig
- Speed square
- Saw guide
- Clamps (parallel clamps and C-clamps)
- Multitool (for cutting the steel bar)
- Nail gun
- Iron (for edgebanding)
Part 1a: The Desktop
For the desktop, I used 1″ thick red oak boards, joined together with biscuits and a biscuit joiner. This was, hands down, the most intense glue-up I’ve ever done. If I were remaking this piece, I’d probably opt for a nice sheet of 1″ thick plywood instead. (Depending on how much weight you plan to put on your desktop, adjust your material thickness accordingly.)
To prep the wood, I ripped the boards to size on the table saw, laid them out to choose which sides would face up, and labeled each piece with painter’s tape to keep them in order. Then I marked where the biscuit slots would go.

I used a biscuit joiner to cut slots about every 6 inches. Since the biscuits here are mainly for alignment rather than structural strength, you could get away with spacing them every 10-12 inches instead – according to Google.
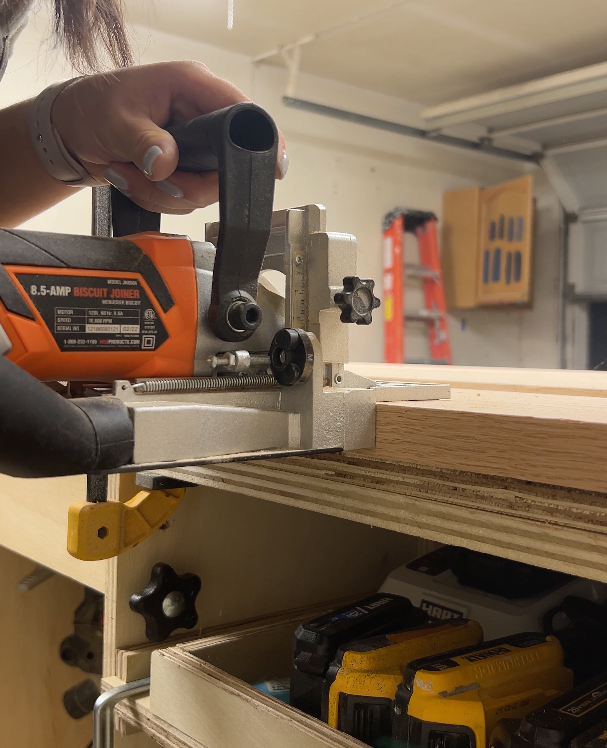
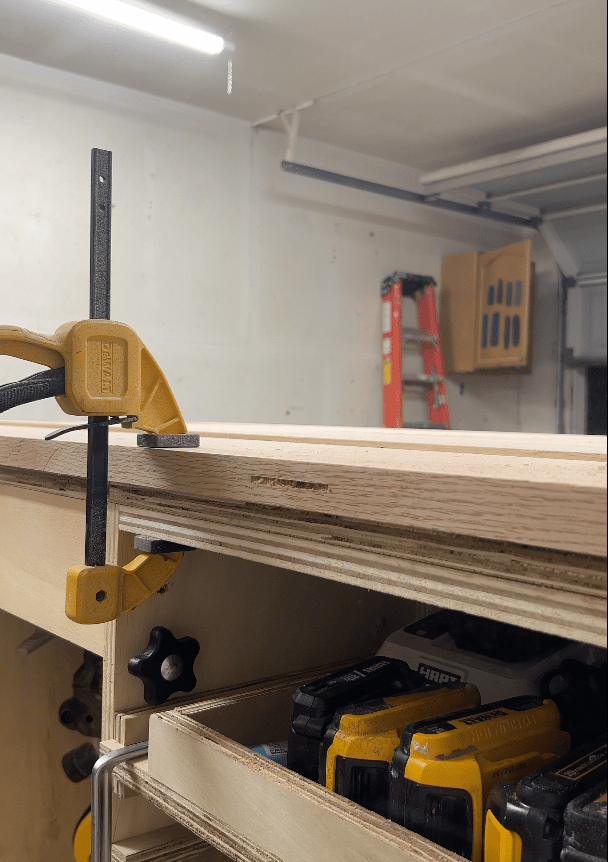
Once I was ready for the glue-up, I positioned 4 parallel clamps on my work surface and laid my boards on top in the correct order. Then added biscuits and wood glue to each joint and tighten the four parallel clamps. I added two 2x4s along both ends of the desktop and secured them with C-clamps to prevent it from bowing. In total, I used about 10 clamps for this glue-up.

After letting it cure for 24 hours, I scraped off the dried glue beads with a chisel. Used a hand planer to level any uneven spots and remove excess dried glue. And finally, finished with an orbital sander, starting at 80 grit and moving up to 120 grit. I didn’t go any higher, since the stain I planned on using calls for a 120-grit surface.


Part 1b: Creating the Pill-Shape
I wanted my DIY standing desk to have a pill shape rather than a standard rectangle. To get that shape, I used a router with a circle-cutting guide, like the one I have here:

My desktop is 30″ deep and 61″ long, so I marked the center point 15″ in from one end, then measured 31″ between the two center points. I used a precision compass to draw the arc first to confirm if I liked the shape before cutting (this step is optional). Using the circle jig, attach the jig mount at the center point. Tip: Make sure you’re mounting it on the bottom side of the desktop.


It took a few passes to fully cut through the 1″ thick desktop. Repeat the same process on the opposite end.


Part 2: The Edge Frame
This step is completely optional. But for the purpose of making a DIY standing desk look like a nice piece of furniture, I wanted to hide as much of the metal as I can. Additionally, this allows me to add a drawer so I can hide my pens, post-its, etc. because why not?

To build the edge frame, take a ¾” piece of wood and rip it down to 2¼” wide (adjust as needed depending on how thick you want the frame to be). The full edge frame needs to wrap around the entire circumference of the desktop — mine came out to 156″ total. You likely won’t find a single board that long, so I split it across two pieces: one 65″ and one 94″, which gave me a few extra inches of buffer in case of any cutting mistakes. I also cut the drawer front (covered in Part 3) from the leftover offcut of the 94″ board, so no material went to waste.

Tip: Start with the 65″ piece, one end of each piece should be a square cut, while the other should be a 45-degree miter cut like this image:

Next I created the kerf cuts where the wood needs to bend. A kerf cut is a shallow groove cut partway through a piece of wood, deep enough to weaken it, but not deep enough to cut all the way through. Making a series of these cuts close together lets the wood bend and curve without snapping. To determine the kerf cut spacing, I used an online kerf-cut calculator. Here are the dimensions I entered:

I started the kerf cuts on one end of the wood, marked based on the spacing the calculator recommended. Using a speed square, I marked each cut location. Then I clamped the wood down to my work surface and, using the speed square as a guide with a circular saw, made the kerf cuts. I made sure to practice on a scrap piece of wood first to dial in the right cut depth.


Once the first piece was cut, I dry-fitted it against the desktop and clamped it in place to make sure it curved enough to follow the pill-shaped edge.

Once the kerf cuts were done, I added pocket holes to help secure the edge frame to the desktop. Finally, I used wood glue and a lot of clamps to slowly bend the wood into place, then secured the edge frame to the desktop.

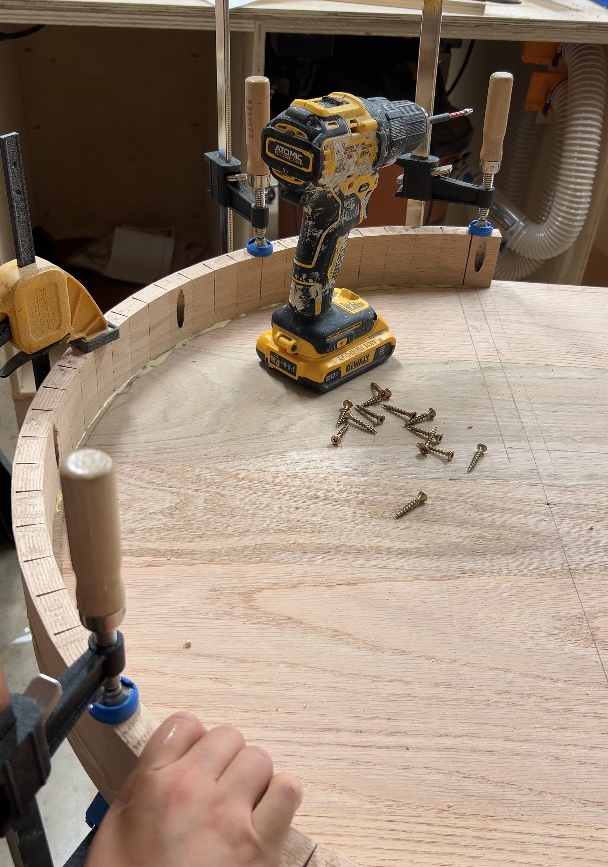
I then moved on to the second piece of wood, cutting it longer than needed to leave room for adjustment. Here’s what it looks like when the two pieces meet (not glued in palace yet).

Here’s a wider view of the desktop for the DIY standing desk! At this point, it’s coming together nicely!!

Part 3: The Drawer
I designed this drawer to hold the controller for the standing desk’s motor. Disclaimer: I’ve found that manufacturers change their controller design fairly often, so if I built this desk again, I’d mount the controller somewhere else instead of hiding it in the drawer.

The first step is adding the support boards that the drawer slides will mount to. I used two scrap pieces of wood, approximately 12.5″ x 2″ each. Add 3 pocket holes to one side of each piece. Then use a speed square to line the scrap boards up flush with the edge of the curved edge frame (as shown below) and mount 12″ drawer slides to them.


Next, I cut down wood boards to build the drawer box (28⅛”w x 12″d x 2″h) and assembled them using lap joints cut on the table saw (I went with lap joinery here because the drawer sides are so narrow; screws risked splitting the wood.) I created a groove on the bottom of the drawer box so the ¼” bottom panel will sit flush once it’s added.


Once the wood glue has dried, fill in any minor gaps with wood filler, then install the drawer box onto the drawer slides.

For the drawer front, I used the leftover wood from the edge frame step (Part 2) and cut it down to 29″w x 2¼”h. Attach it to the drawer box with 1¼” screws driven from the inside.

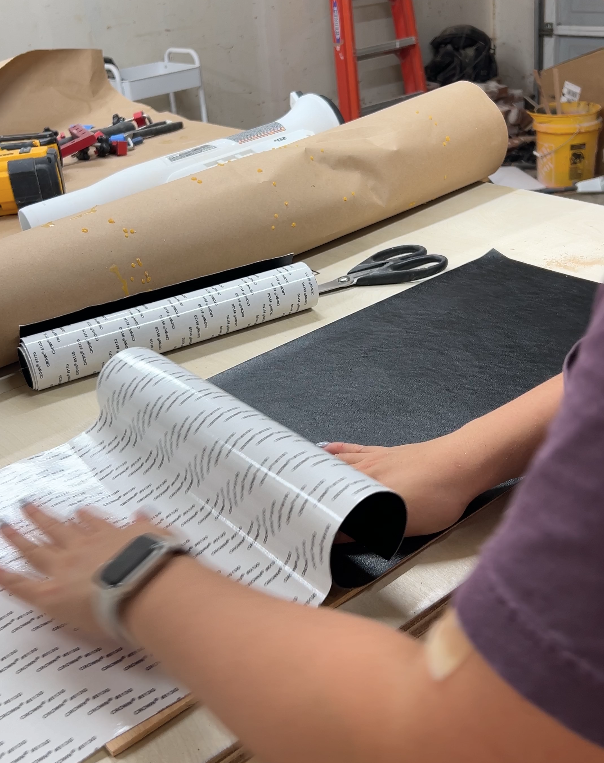
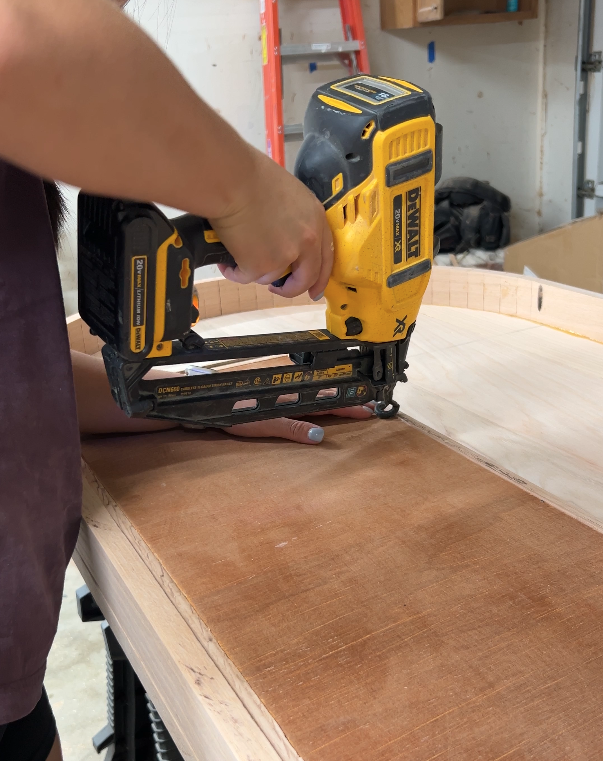
Finally, I added a leather liner to the drawer bottom which is made of 1/4″ plywood and secured it in place with a nail gun.
Part 4a: Base Structure
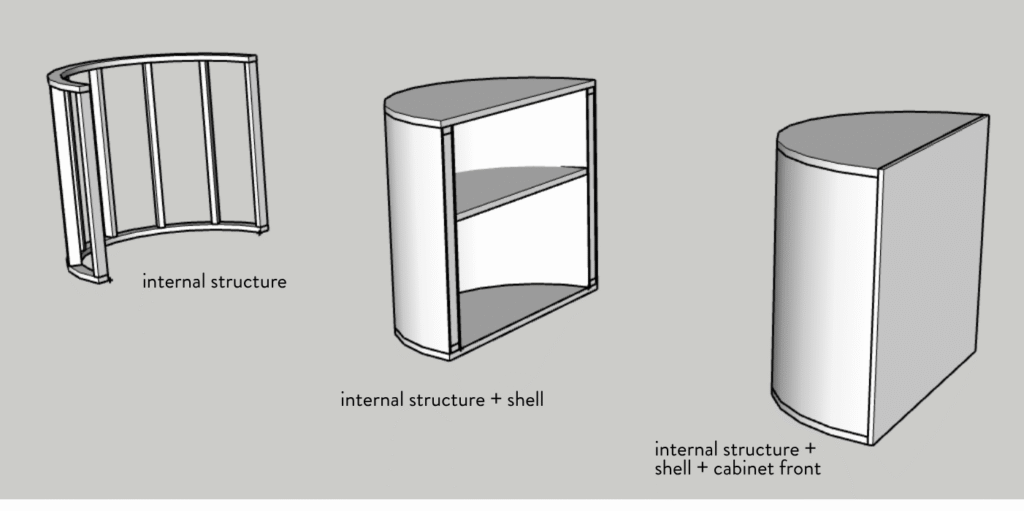
I wanted the base of my DIY standing desk to function like a cabinet, and that shaped how I built the base. We’re starting by creating an internal structure out of a standard sheet of plywood — since this layer won’t be visible in the finished piece, the type of plywood you use doesn’t matter.
Cutting the Structure Rings
Determine the centerpoint of your plywood sheet, then draw a straight line across it through the centerpoint with a straightedge — this will help when you need to cut the rings in half. The rings need to be ¼” smaller than the radius of the desktop, since we’ll be wrapping this frame in ¼” plywood afterward. My desktop has a 15″ radius, so the rings I’m cutting have a 14¾” radius.


Attach your circle-cutting jig’s centerpoint mount. Cut the outer circle first, then the inner circle, without moving or resetting the centerpoint mount.


Once the rings are cut, slice each one in half to create two semi-circle rings, using the centerline you drew earlier as your cutting guide. After cutting the rings in half, double-check that both halves are the same length. Stack them on top of each other and mark where you want the vertical supports to go — one at each end, obviously, then eyeball the spacing for the remaining 5 supports. I used a scrap piece of plywood as a straightedge to mark the locations with a pencil.


Adding the Vertical Supports
I used 7 vertical supports for each base. To make them, use a table saw to cut 7 pieces of plywood, each 1.5″ wide by 22.5″ long.

Next, use accelerator glue to attach the vertical supports to the rings. If you never used accelerator glue before, it’s a two-part adhesive: you apply glue to one surface and spray an activator on the other. When the two touch, the glue sets almost instantly — just hold the pieces together for a few seconds and they’ll bond.

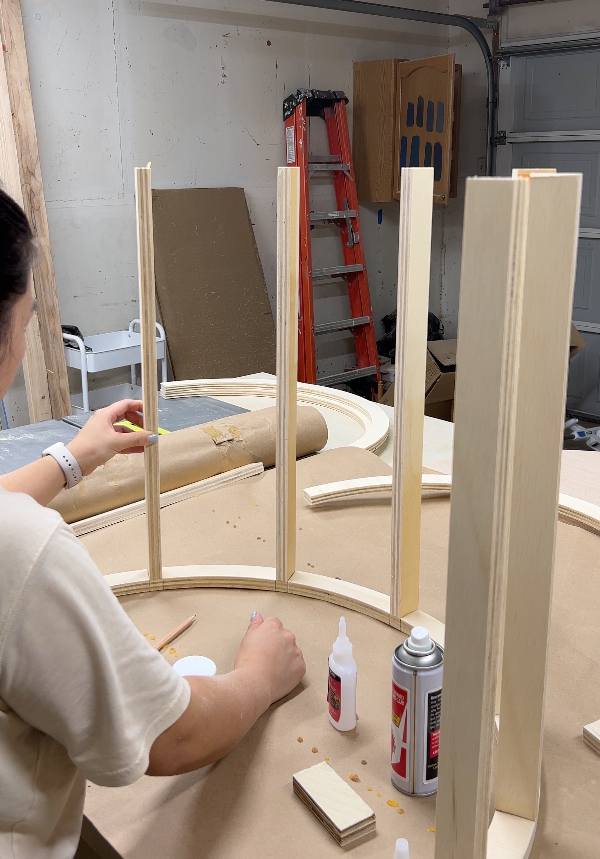
Repeat this until all 7 supports are attached to the first ring. Then add the second ring on top of the vertical supports and secure it with 1.5″ wood screws. Be sure to align the supports with the marks you made earlier — this keeps them perpendicular to the rings.


Finally, flip the structure upside down and drive wood screws in from the other side to lock the first ring to the vertical supports. Repeat this entire process for the second base.

Part 4b: Base Shell
With both internal structures built, it’s time to move on to the shell. The shell is made from ¼” oak plywood. (Alternatively, you can also use bendable plywood and wrap it in oak veneer).
Start by cutting down the plywood into four panels, roughly 25″ x 48″ — intentionally larger than the finished dimension so you have room to trim the excess later.
Lesson learned: the first time I built this, I cut the panels to the exact final size. Lining them up perfectly with the structure was frustrating, and one panel ended up bowing. Give yourself extra material to work with.
Making the Kerf Cuts
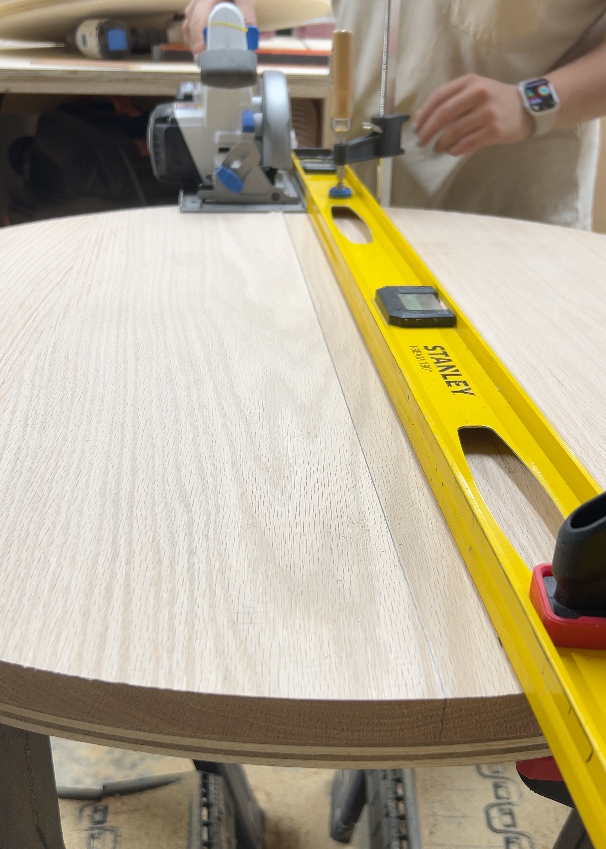
Start by making kerf cuts on the back side of each panel. Kerf cuts are what let the plywood bend around the curved internal structure. I’d recommend using a saw guide, or a straightedge and clamps, on a flat, even work surface.
Tip: Test your cut depth on a scrap piece of wood first. You want the blade to score deep enough to let the plywood bend, but not cut all the way through. Adjust your saw depth accordingly.


Clamp one end of the panel down and cut from the opposite side with a circular saw and saw guide. If your guide isn’t long enough to span the panel, rotate it once you hit the guide’s max length and keep cutting. I don’t remember my exact spacing — roughly every ¼”, but confirm on a scrap piece first. Go slowly, and repeat 4 times (once per panel).


Attaching the Shell
Once all the kerf cuts are done, grab wood glue, painter’s tape, and clamps for the next step. Apply a liberal bead of wood glue to the plywood ring structure, then lay the ¼” panel on top — with the kerf cuts made, it should bend into place easily. Use painter’s tape and clamps to hold everything in position while it dries.


Once it’s dried, use a router with a flush-trim bit to remove any excess plywood so the panel sits flush with the internal structure.


I glued the inner panel for both bases first and let them cure for a full day. Then I came back the next day, attached the outer shell, and let that cure for another full day before moving on. Once both sides are wrapped in plywood, finish the edges with iron-on oak edgebanding.


Part 5a: Base Top Cap
We’re almost to the final stretch here. This part gets a little complicated — honestly, I feel like I blacked out during this step and didn’t document it as thoroughly as I should have, so bear with me. If you find an easier way to do this, let me know in the comments! Here’s a visual of what we’re building next:

To create the top and bottom caps, I used solid wood for the caps and the shelf — plywood with edgebanding would work just as well.

Using the router and circle jig, create two more circles at 30″ diameter, plus one circle at approximately 26″ diameter. Once all three circles are cut, slice each one in half. This gives you 4 large semi-circles and 2 small semi-circles.

Cutting the Leg Hole
For the two top caps, cut a rectangular hole so the base can slide over the standing desk leg. To find the right location, secure the desktop upside down on the frame, then measure the distance from the desk’s edge to the frame legs. I made my holes ½” larger than that measurement for some wiggle room, and cut a cardboard template first to test the fit before cutting into the good material.


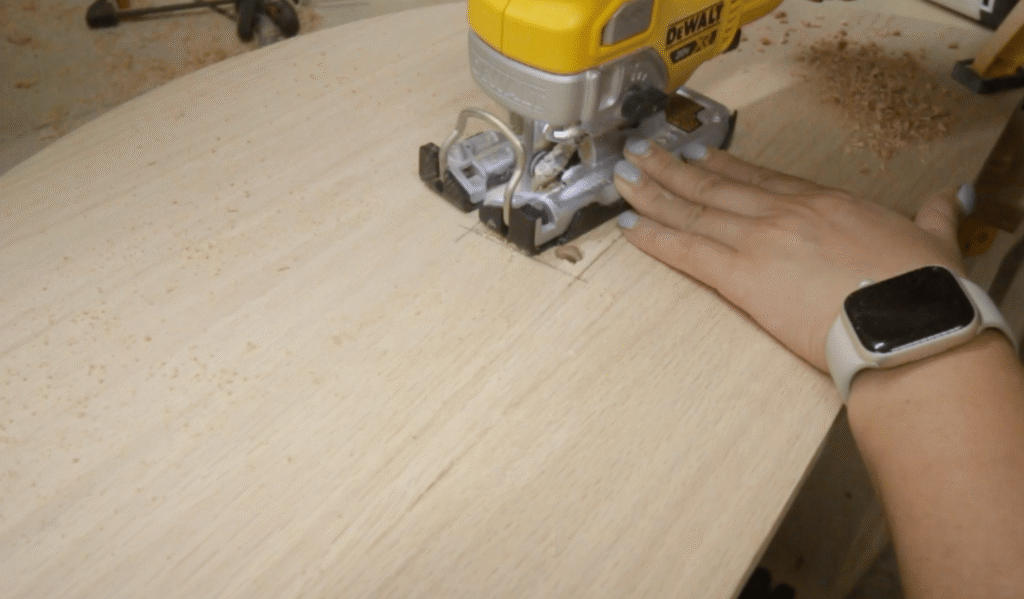
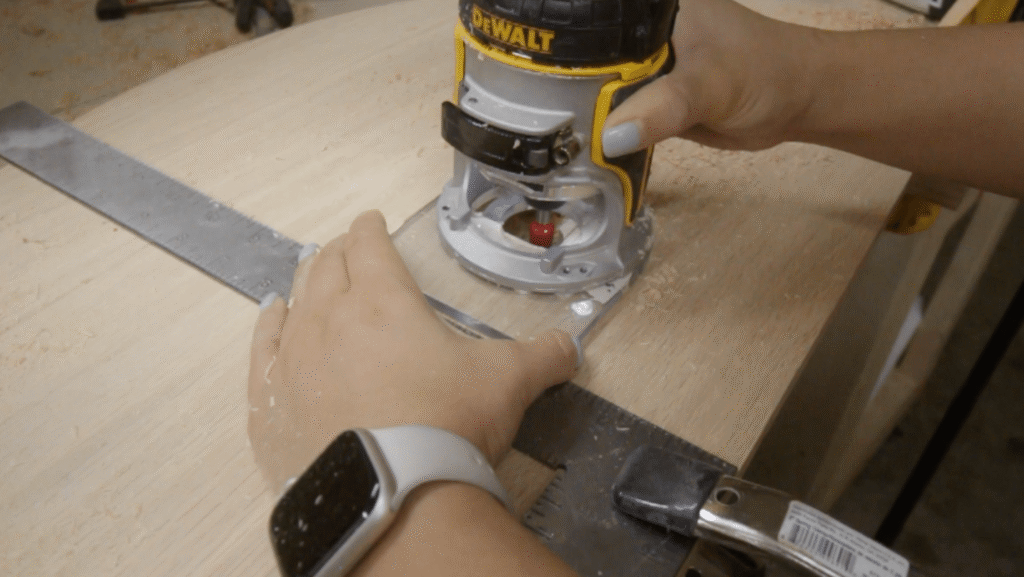
I traced the template onto the wood, then predrilled a ½” hole in each corner. Using a jigsaw, I roughed out the hole, cutting close to the line but not all the way to it. Finally, I cleaned up the rectangle with a router, a straight bit, and a straightedge guide.


Attaching the Top Cap
Once the hole is cut, attach the top cap to the curved shell you built in Part 4b. I attached mine with 2″ wood screws driven from the top, using a trick to hide them: I chiseled up a small flap of wood, countersunk and drove the screw into the recess, then glued the flap back down over it. This gives you a completely hidden screw.


Another option is to use figure-8 fasteners, or add pocket holes to the shell strategically placed where the internal supports are. Finally, dry-fit the base over the desk frame to check whether any adjustments are needed, then repeat the same process for the other side.

If you’d like a shelf in the cabinet, cut a rectangular hole in the smaller semi-circle you made earlier, then slide the shelf in. I used shelf pins to hold it in place once the standing desk is upright, but it has not held up well. I’d recommend looking into other methods for the shelf!


Part 5b: Base Bottom Cap
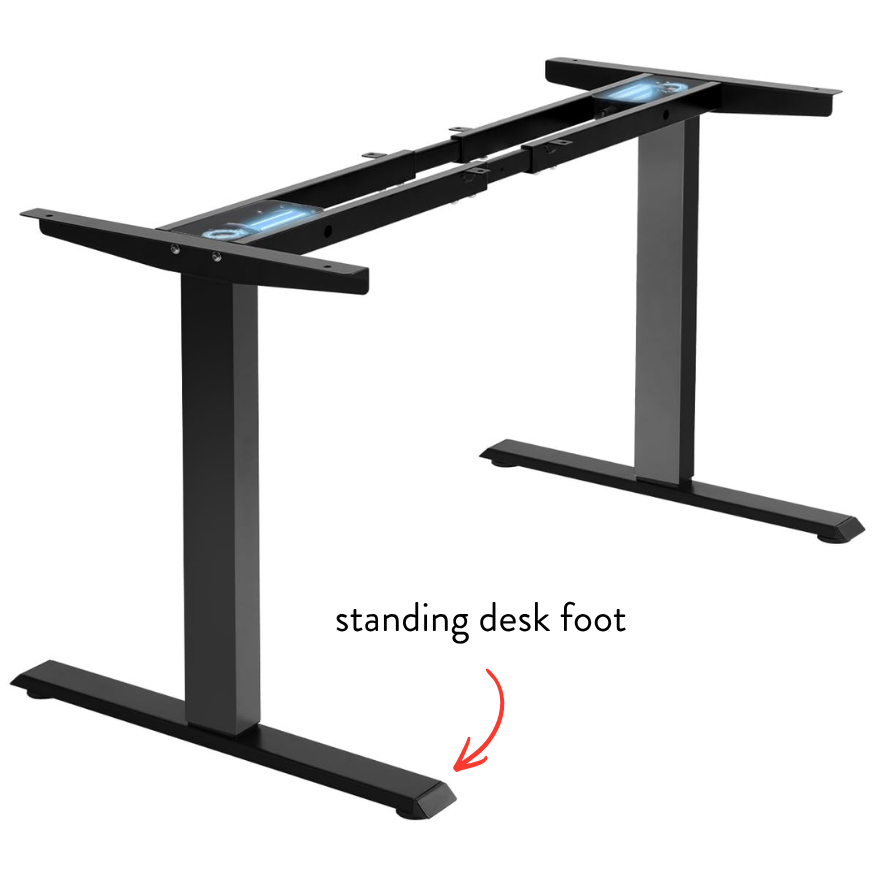
This is the trickiest part of the build, and to be honest, I’m not sure I did it the most effective way — I’ll try to explain it as clearly as I can. I replaced the foot of the standing desk frame with the bottom semi-circle cap.
There are several layers to this piece, stacked together:
- The bottom cap itself, which closes off the base cabinet frame.
- A steel bar, 2″ wide by ⅛” thick, for reinforcement.
- A second ¾” semi-circle of plywood, which covers the steel bar and creates a flat surface for the frame’s foot to sit on.
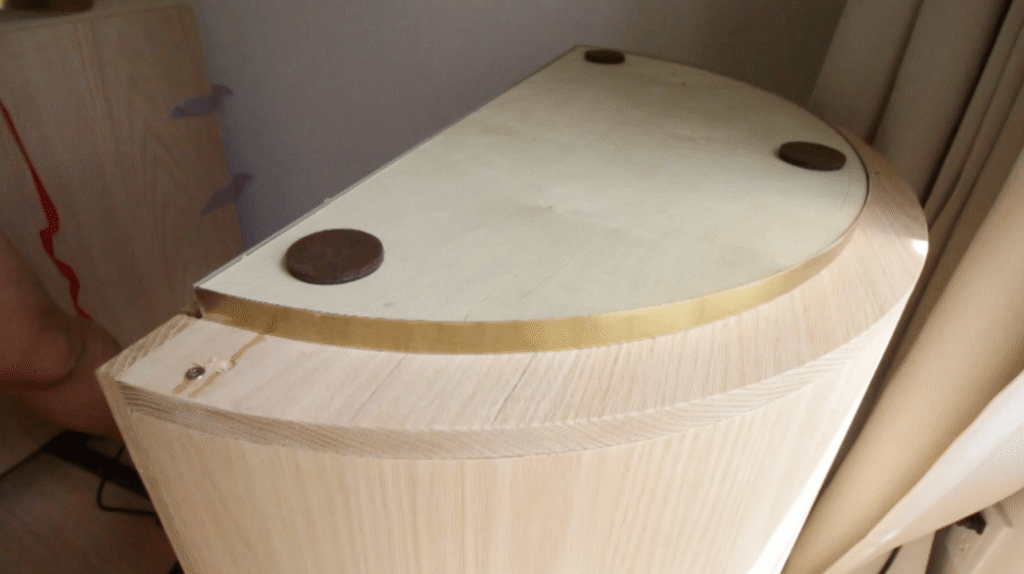
Making the Screw Template
Once the foot was removed from the leg, I made a template to transfer the screw placement. I taped a piece of thick paper down with double-sided tape, placed the bottom cap on top, and traced around the foot. Once lifted, the paper template stayed stuck to the bottom cap. I predrilled all 4 holes straight through.


Prepping the Steel Bar
I cut the steel bar down to about 2.5′ with a multitool. Using the original frame foot as a guide, I traced the hole placement onto the steel bar, then predrilled the holes with a metal drill bit.


Because this added extra thickness, the original screws that came with the desk (for mounting the foot) were too short. I replaced them with longer M6-1.00 x 35mm screws on top of some washers. Then secure the bar to the bottom cap with wood screws.

Adding the Final Flush Layer
We can’t leave the base like this, since it won’t sit evenly on the floor once the desk is right-side up. To fix that, I cut another semi-circle out of plywood — actually reusing the offcut material from the rings back in Part 4a. Using a router with a straight bit, I removed sections of the plywood to create a shallow cavity.


This lets the final plywood piece sit flush against the bottom cap, making even contact with the floor while completely hiding the steel bar underneath. I secured it with standard 1 1/4″ wood screws and some felt furniture protectors.
Part 6: Finished Cabinet
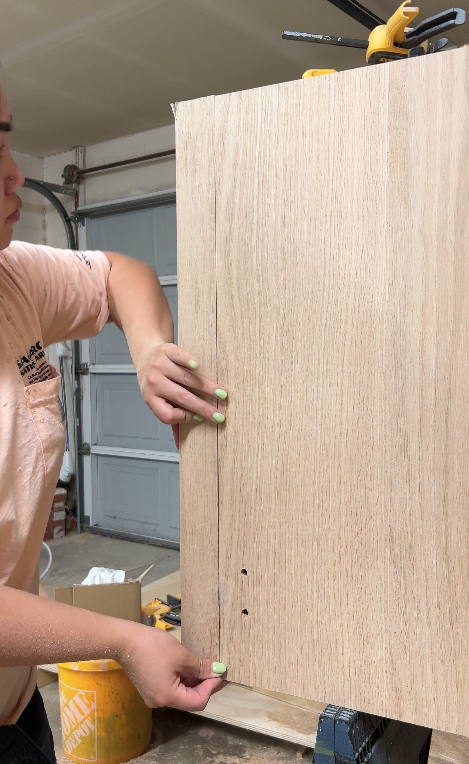
The final step! For the cabinet front, I used ½” wood I had left over from a previous project — ¾” plywood would work just as well here too. I installed two hinges on each cabinet front. Since the hinges I used are sized for ½” material, I added a thin ¼” strip of wood behind the front to build it up to the right thickness. I used a Kreg hinge jig to drill the hinge cup holes.
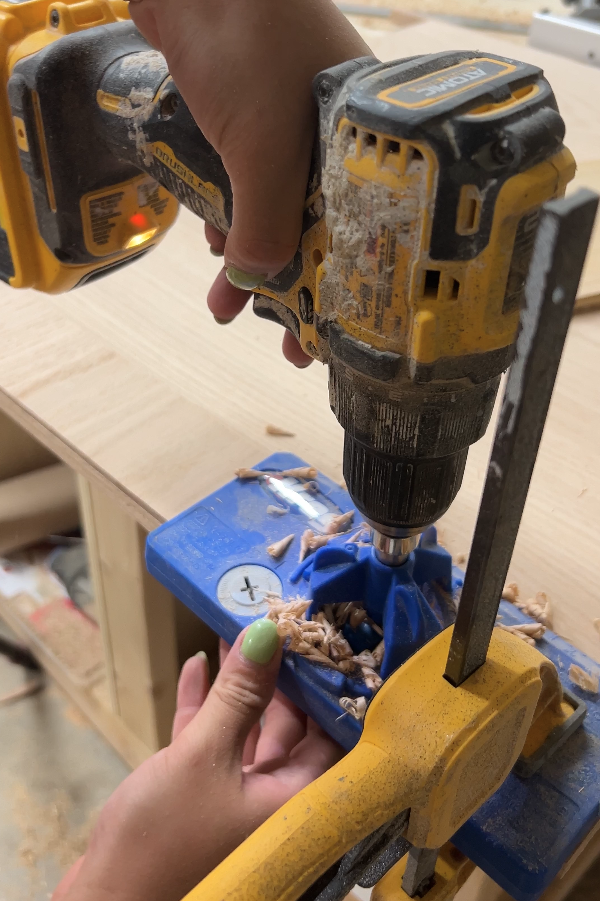

To attach the hinges to the base, I built a small mounting block that creates a flat, even surface for the hinge plate to sit on.


Once the cabinet door is in place, the final piece is the trim on the side where the door hinges. I simply attached it with my nail gun.

Part 7: Power
I don’t have much footage for this part. But here’s some pics of power and cord management. I attached a power strip under the desktop – the kind that can be mounted vertically. Then ran the power cord through the cabinet feeding out under the base. I plugged the standing desk frame into this power strip along with laptop monitor etc.


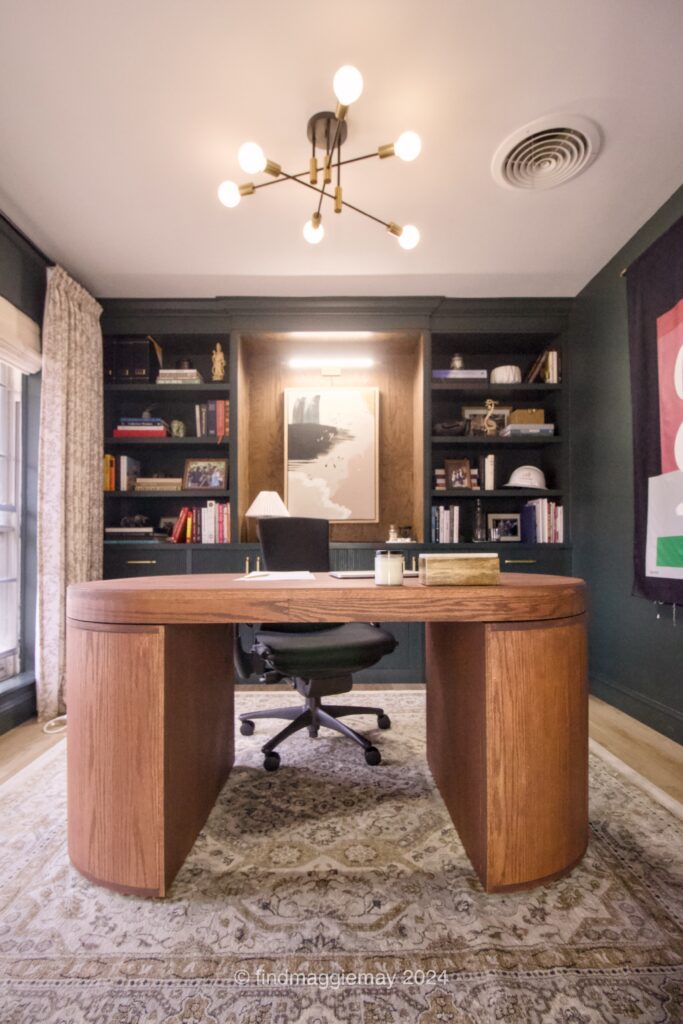
The Reveal
If you’ve made it this far, a big congrats to you! I would love to see your variation of this DIY standing desk build, if you attempt it, please send me a picture I’d love to see what you create.





Comments +