


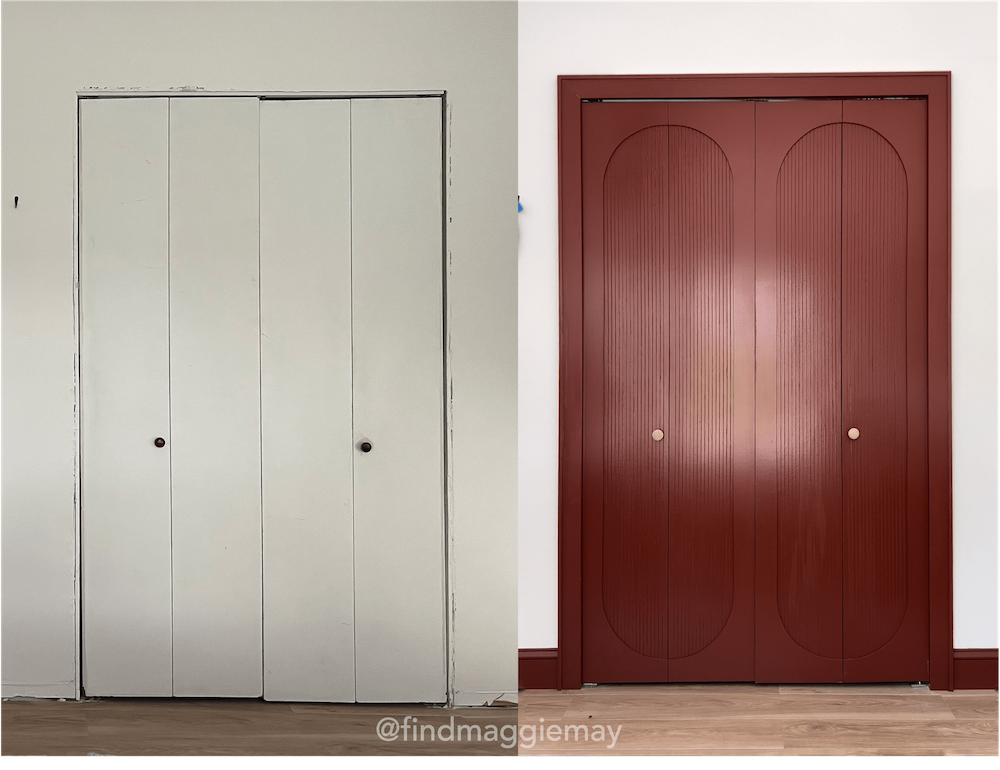
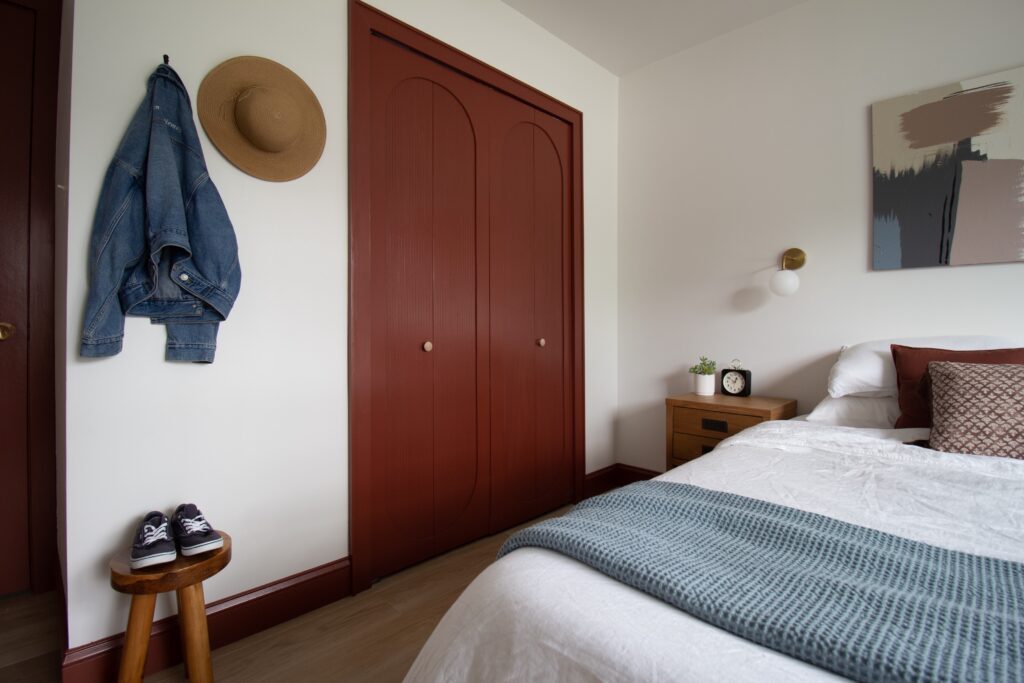
Do you have these outdated bi-fold doors in your home? Well don’t worry, I’m going to show you an easy way to transform bi-fold closet doors and turn them from drab to fab all in one days of work!
Tools Needed:
- Router
- Router Tip Set
- Circular Saw
- Sander
- Paint Sprayer
- Clamps
Materials Needed:
- Sandpaper
- Painter’s tape
- Pencil
- 1/4″ MDF (Medium Density Fiberboard)
- Liquid Nails (or similar adhesive)
- Caulk
- Primer
- Paint
Step-by-Step Guide to Transform Bi-Fold Closet Doors:
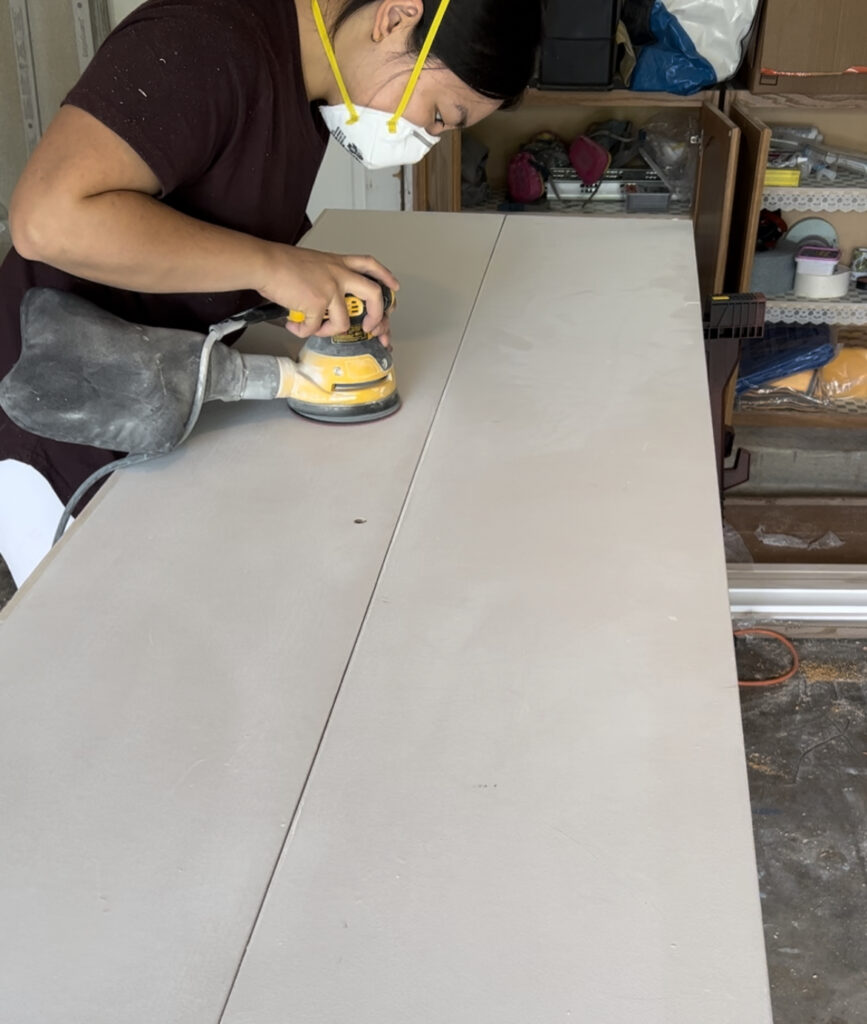
Step 1: Lightly Sand the Door
Start by lightly sanding the surface of the bi-fold doors to remove the existing finish and create a smooth base for the next steps. Use medium-grit sandpaper and ensure even sanding across the entire door.
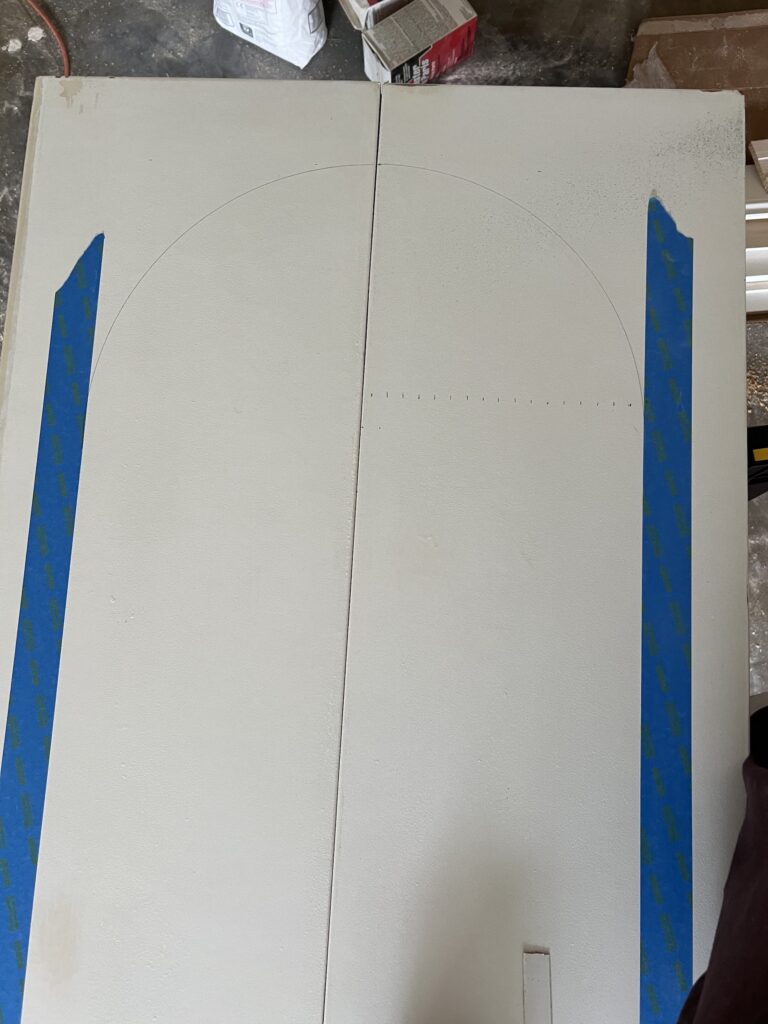
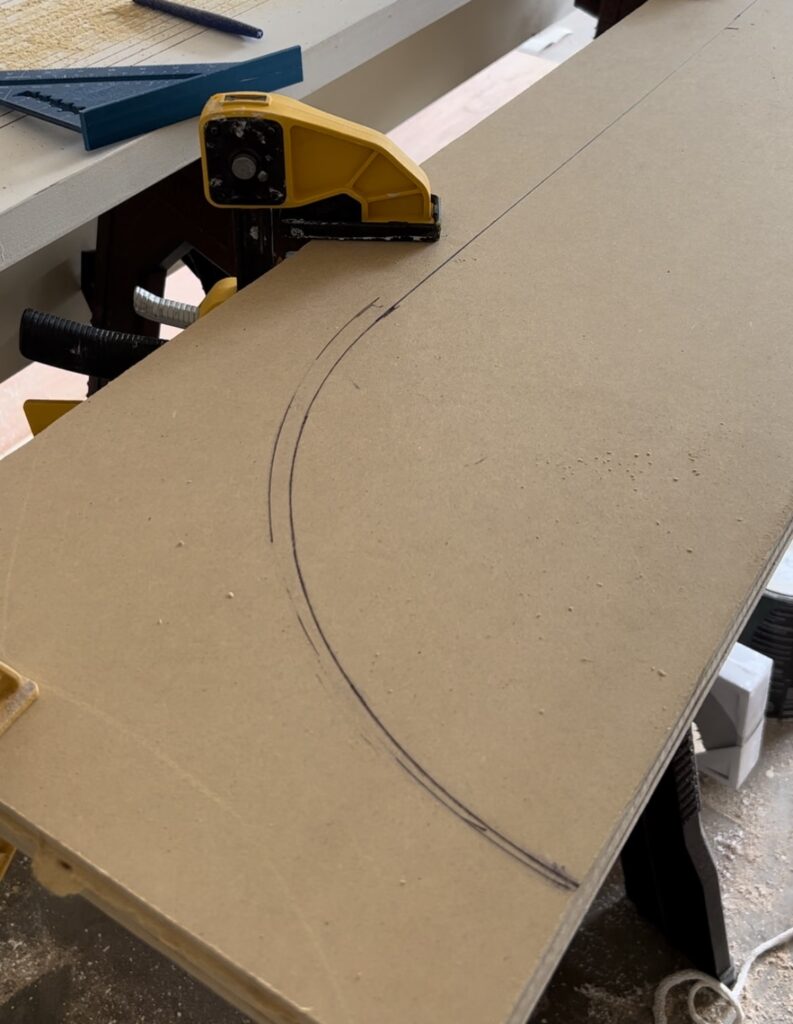
Step 2: Determine Border Size with Painter’s Tape
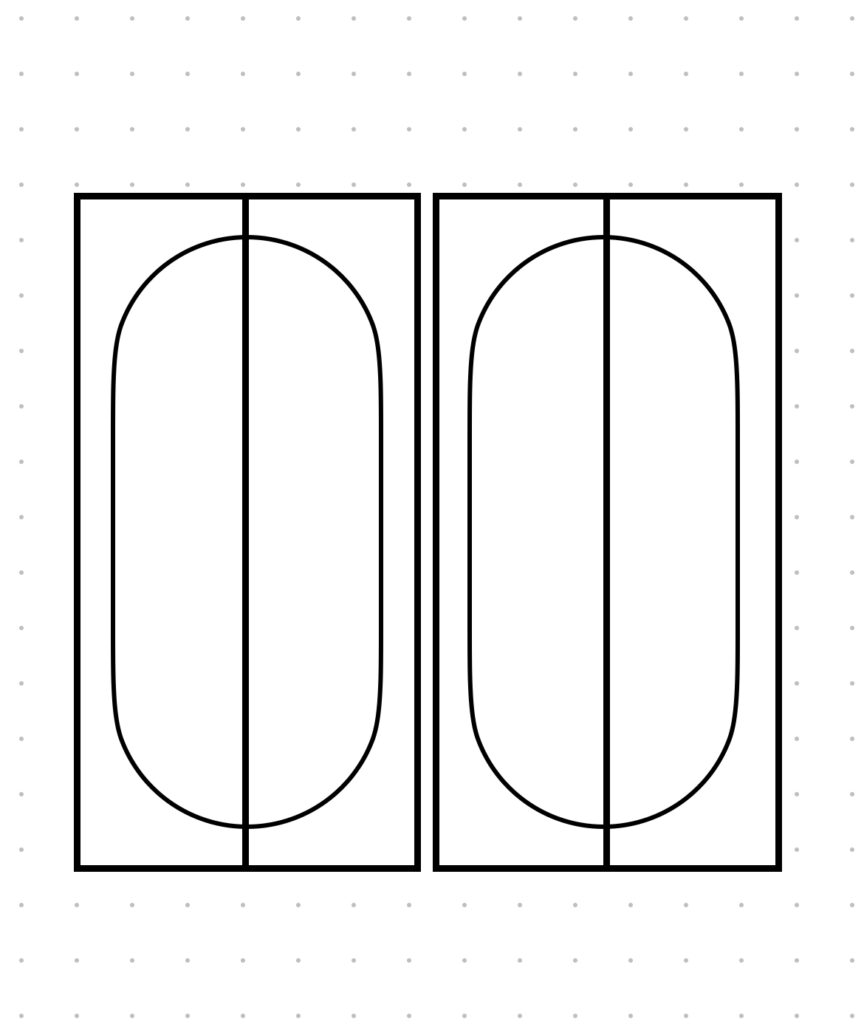
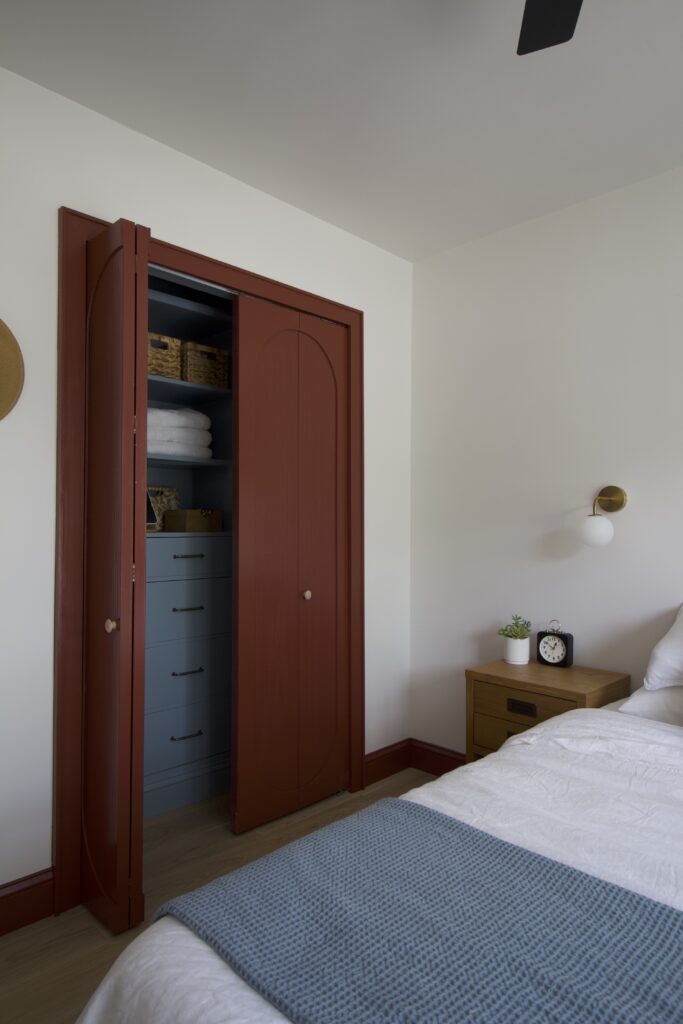
We are going for a pill shaped border design. I used painter’s tape to visualize how wide I want the borders to be, and then drew an arch on each set of doors. There are 4 door panels, but I want it to look like two french doors, so I drew “half” of a pill shape on each panel of the door. The arch doesn’t need to be perfect yet, since it will be covered in the later step.
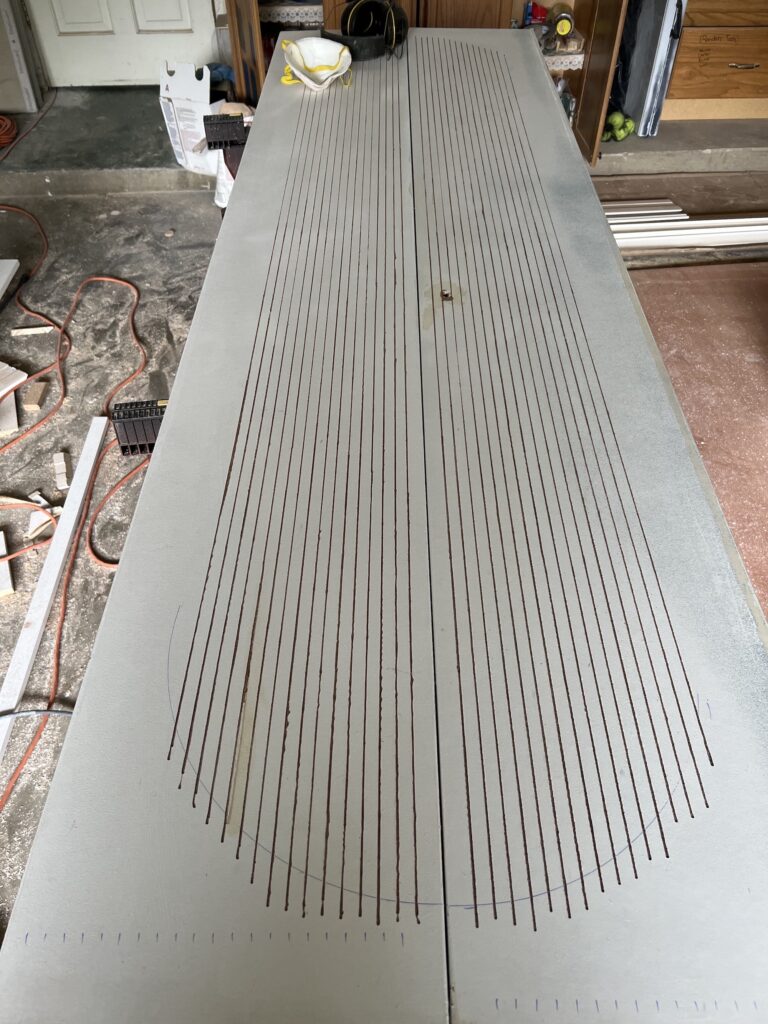
Step 3: Route Vertical Lines
Inside the pill shape, I wanted a fluted or pole wrap design but I didn’t want to buy more material since those can get kinda pricey. Instead, I used a router to make vertical lines for a faux slat look. First I clamped a straight edge to the door. (I used a 1×2, but make sure it’s actually straight and not warped!) I used a v groove tip to carefully route vertical lines on the door, spaced 1/2″ apart at about a 1/16″ depth. It took a while to get into the groove of things since I needed to go over the lines twice but once I got a hang of it, it went smoothly.
Step 4: Cut MDF Panels
Next we are going to use 1/4″ MDF to create the pill shaped border. My local Home Depot store didn’t carry full sheets of 1/4″ MDF so I purchased them at a local lumber yard. I used a circular saw to cut the MDF into the size of the 4 panels. Thankfully I was able to use just one sheet of MDF.
Step 5: Route Border Shape
I drew the pill shaped design on one of the MDF. Take your time here to make sure the shape is perfect before moving on to the next step. I wanted to make sure I cut each panel so the arch matched identically, so I stacked the 4 MDF panels on top of each other and used the router with a straight router bit to cut out the shape.
Now, I’d like to note that this is NOT the correct way of doing it, but I was limited in tools. The correct way of doing this is using the straight bit to cut one of the panels, then use that panel as a template for the rest, and use a flush trim router bit for the rest of the panels. I didn’t have flush trim bit me and didn’t have a car to get a new one (also was on a time crunch).
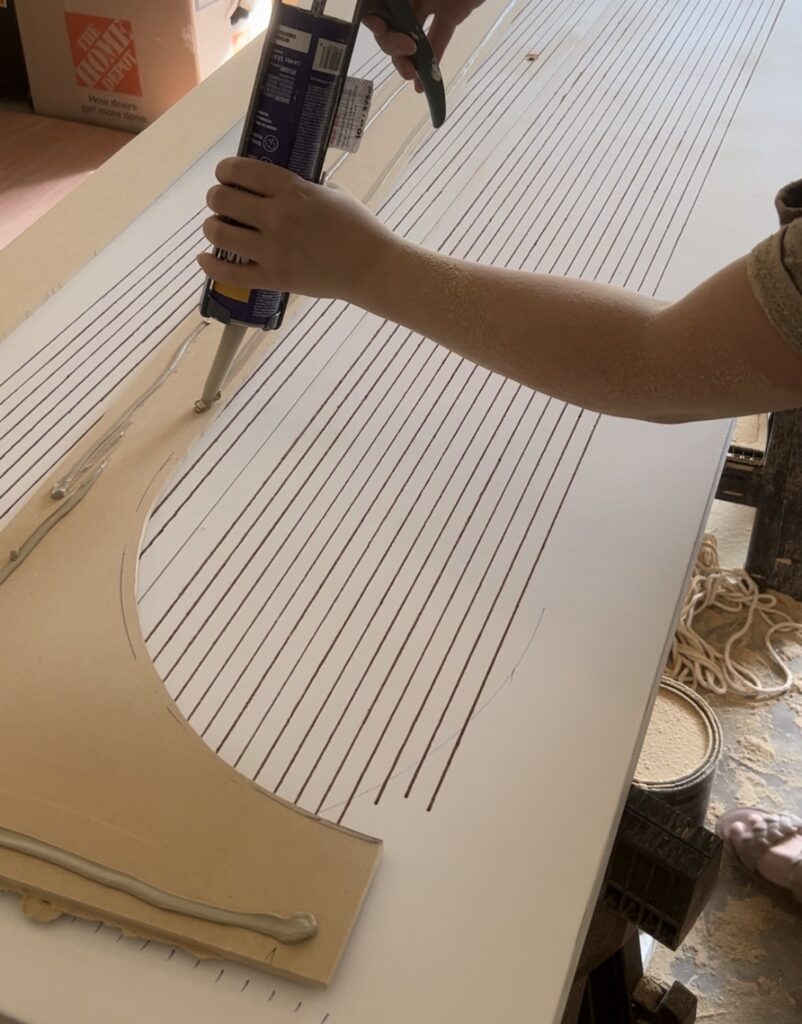
Step 6: Adhere Border to the Door
I cleaned off the doors and made sure there was no dust or debris. Then apply liquid nails or a similar adhesive to the backside of the MDF panels and firmly press them onto the doors. Use clamps to secure the MDF panels in place while the adhesive dries, following the manufacturer’s instructions for drying time. Once adhesive has cured, apply a bead of caulk between the MDF and doors for a seamless look.
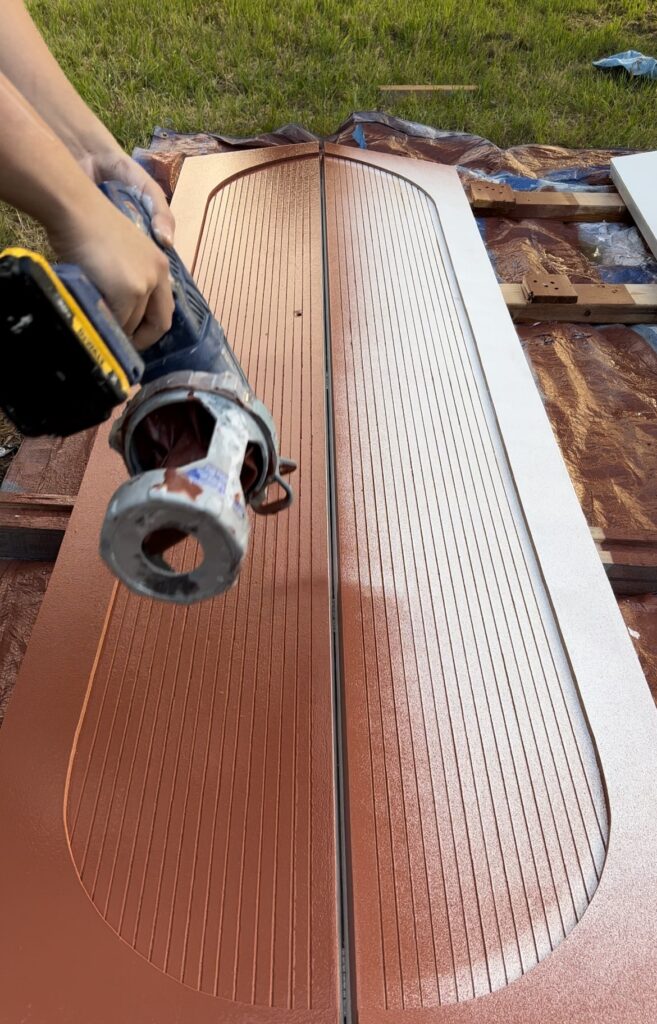
Step 7: Prime & Paint Doors
Now for the fun part, vacuum the doors, wipe down with a tack cloth and make sure all the dust have been removed from the surfaces. Prime your MDF with a quality primer. This is important as MDF can be very absorbent, but using primer will help give it a layer of protection.
Next, I recommend using a sprayer to paint the doors due to all the crevices, but a foam roller will work just as fine! It is also a good idea to use a paint that is specific for doors or trim as it have better durability. I always use my favorite paint sprayer for projects like this!
Step 9: Install the Hardware
Once the paint is completely dry, install the bi-fold door hardware. I used this one and it was very easy to install.
Final Results:
By following these step-by-step instructions, you can easily transform your bi-fold closet doors! Transforming bi-fold closet doors has never been easier, so get ready to enjoy the beauty and satisfaction of your personalized, upgraded doors!


Love all your designs! What size boards make up the trim around the door?