


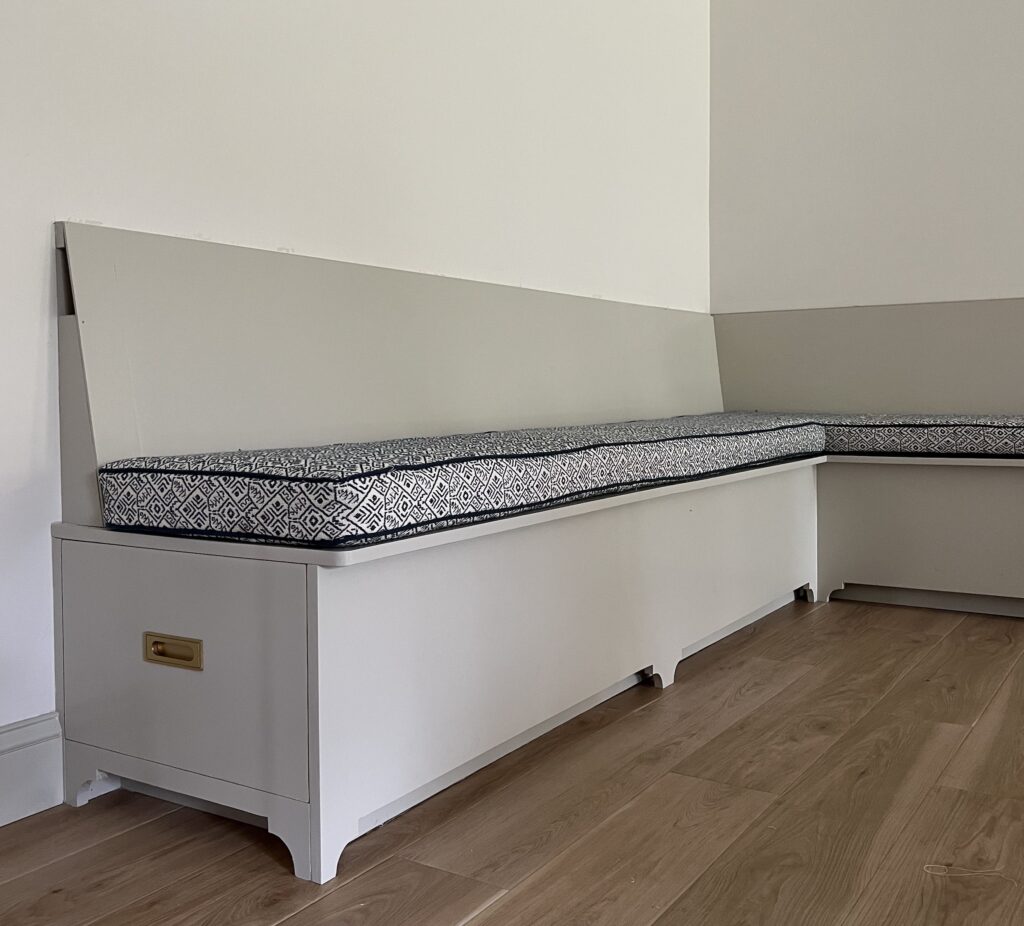
As a part of the One Room Challenge, I have been working on building a custom banquette for our dining area. It currently looks like this!
We are now on the last step which is to upholster a channeled backrest for the bench! I have researched so many ways to create the channeling and think I’ve found the perfect way that any beginner can try. Upholstering channels are a great way to add visual interest to a piece of furniture. In this blog post, I will provide the step by step process as well as all the tools and materials needed.
Jump To:
Step 1: Preparation
Step 2: Upholstery
Step 3: Secure Backrest
Materials Needed
- 1″ high density foam
- Medium weight batting
- Upholstery fabric
- Upholstery tack
- Staples
- Mini L brackets
- Painter’s tape
- Spray adhesive
- 1/2″ Plywood
Tools Used
Part 1: Preparation
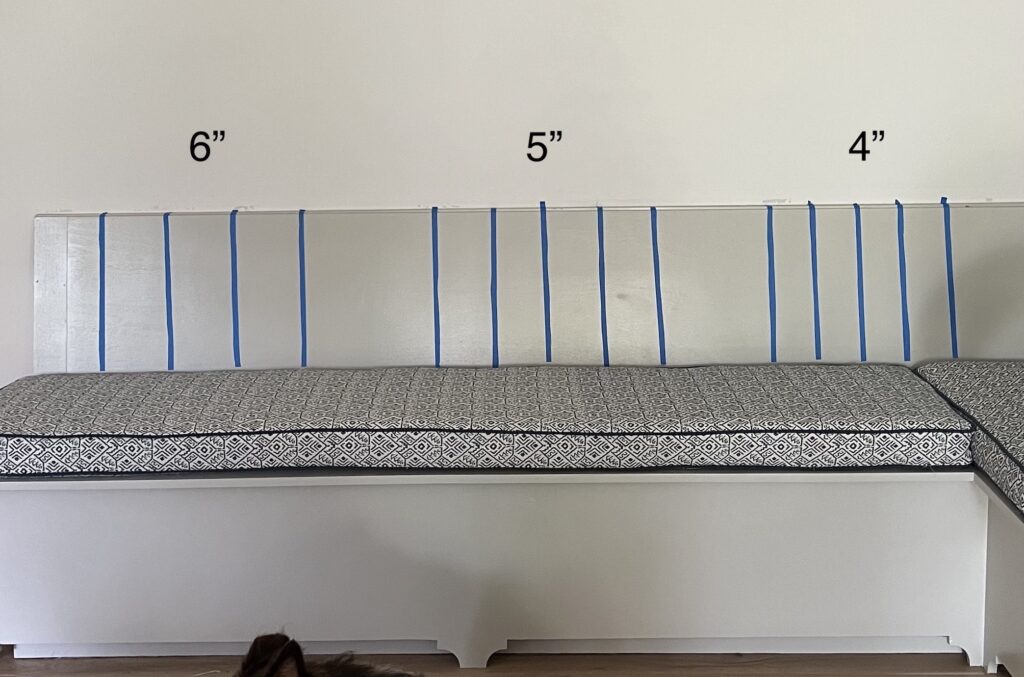
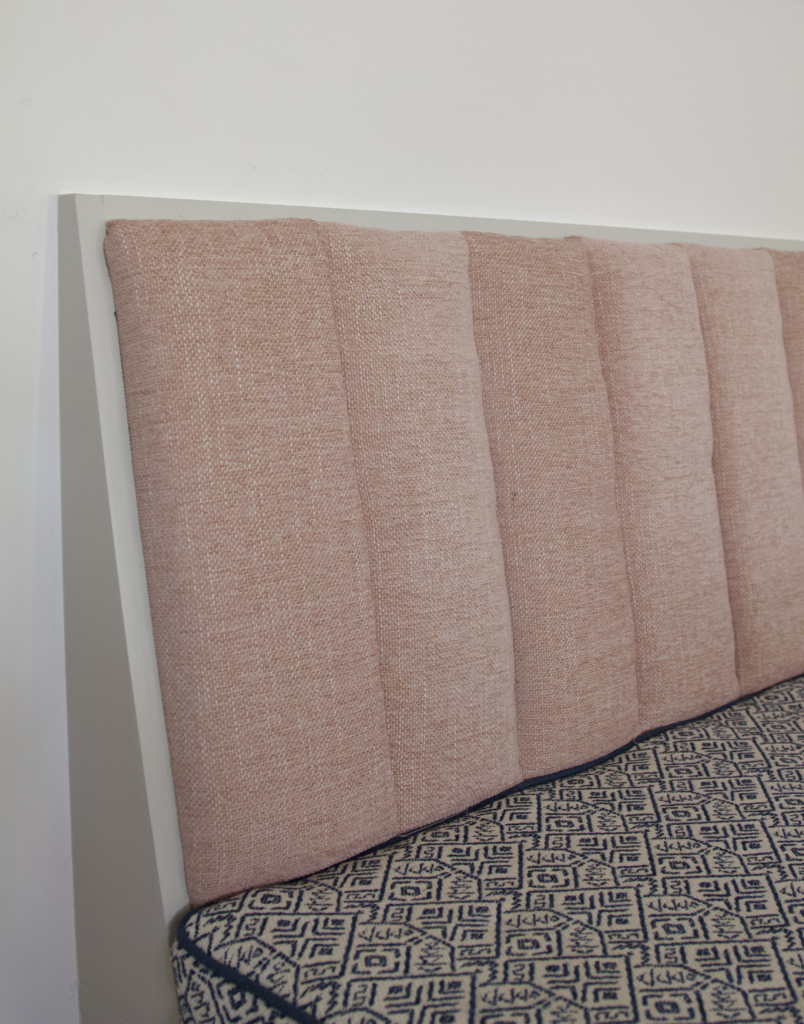
Determine how thick you want your channels to be. I used thin painter’s tape to mark the banquette so I can visualize the various sizes. Ultimately I decided 5.5″ would be the perfect size for our banquette.
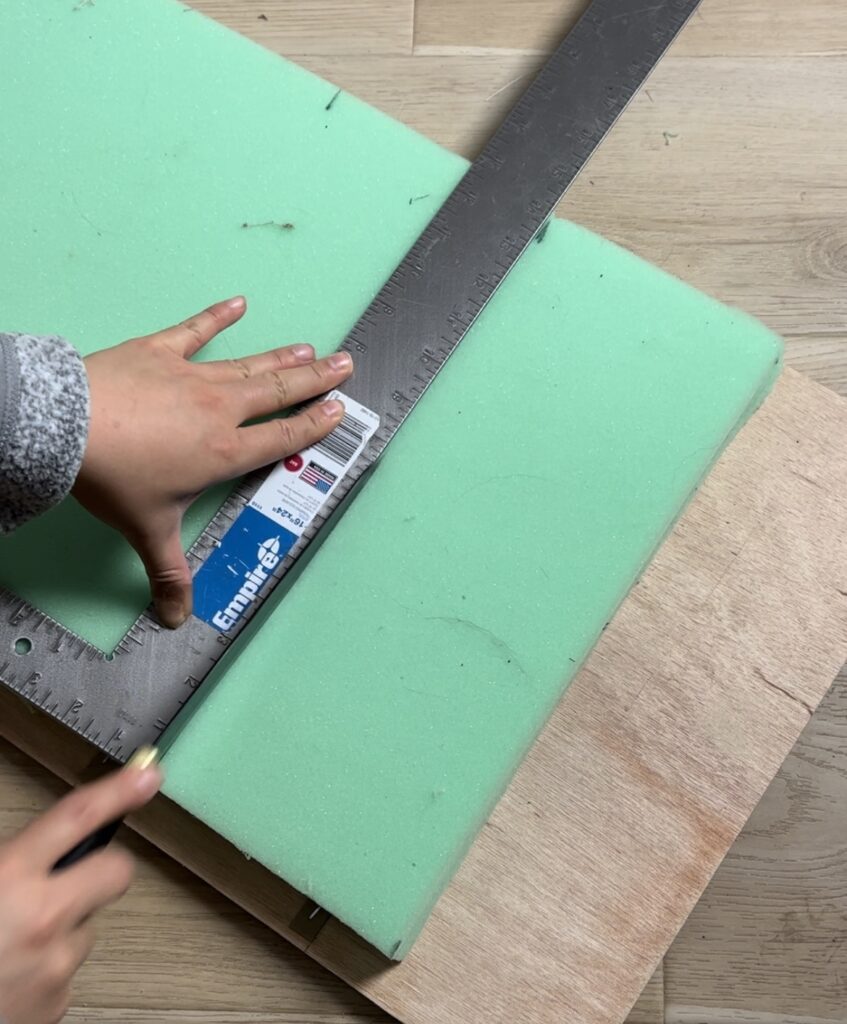
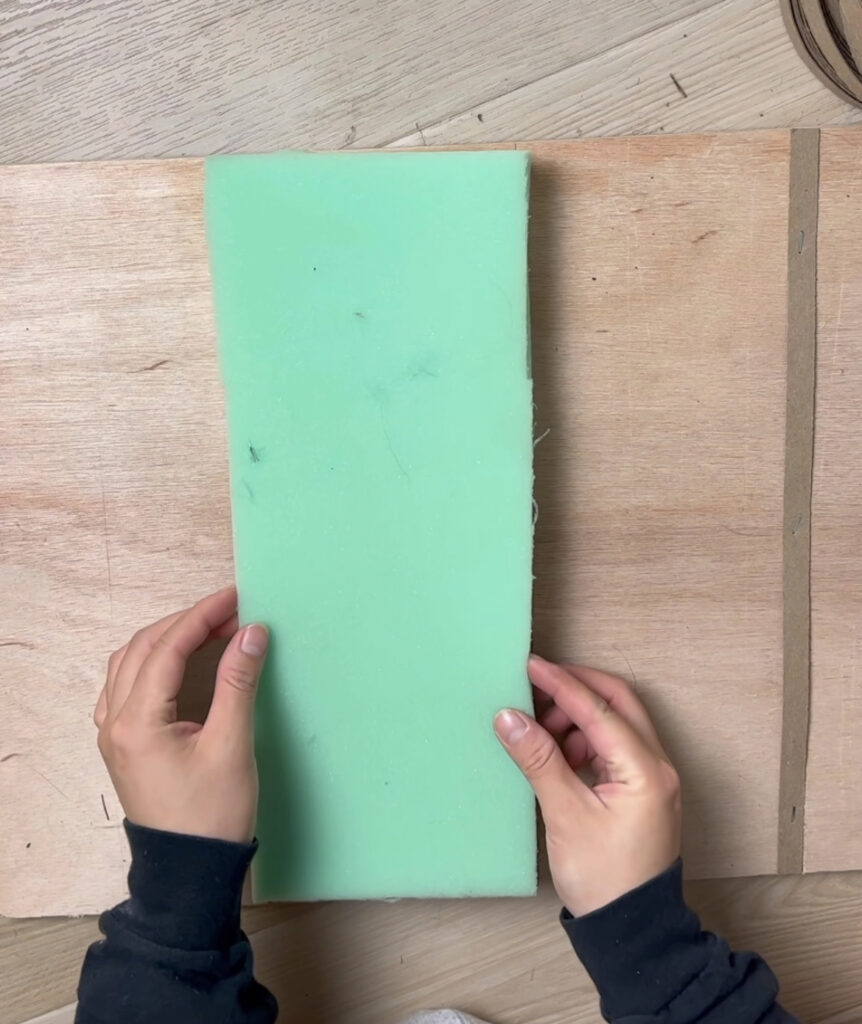
Next we cut the 1″ high density foam into 5.5″ by 15″ rectangles. We didn’t have an electric foam cutter so we just used a bread knife which worked fine! The trick is to make multiple light passes with the knife and that will provide a clean cut.
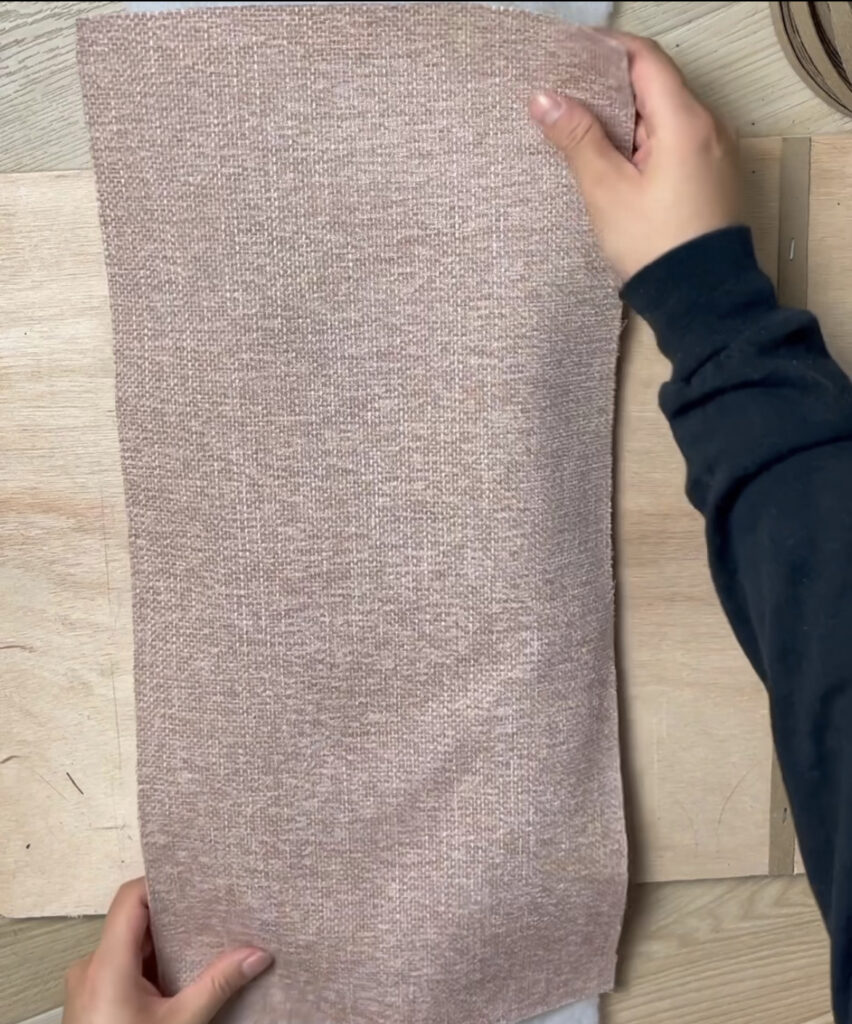
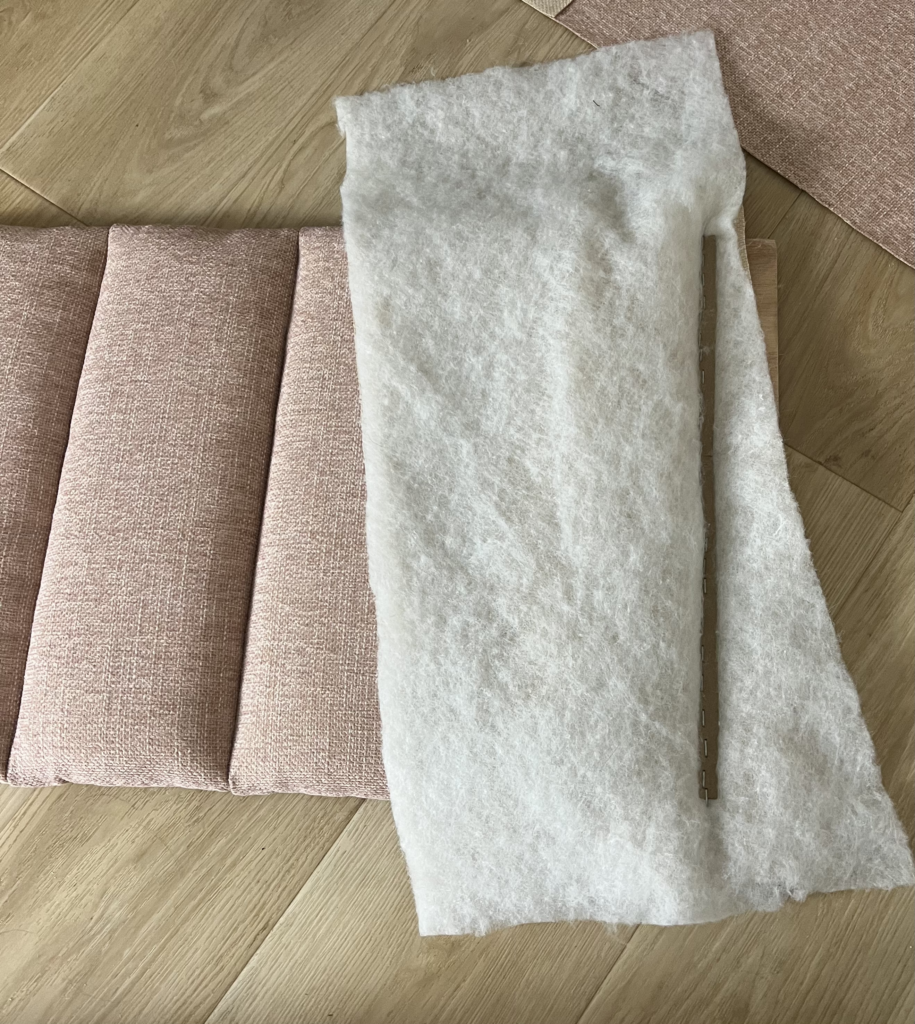
Then we cut the medium weight batting and upholstery fabric to size. We cut those into approx 9″ x 18″ rectangles so that there is enough fabric to cover the foam but also to wrap around the wood.
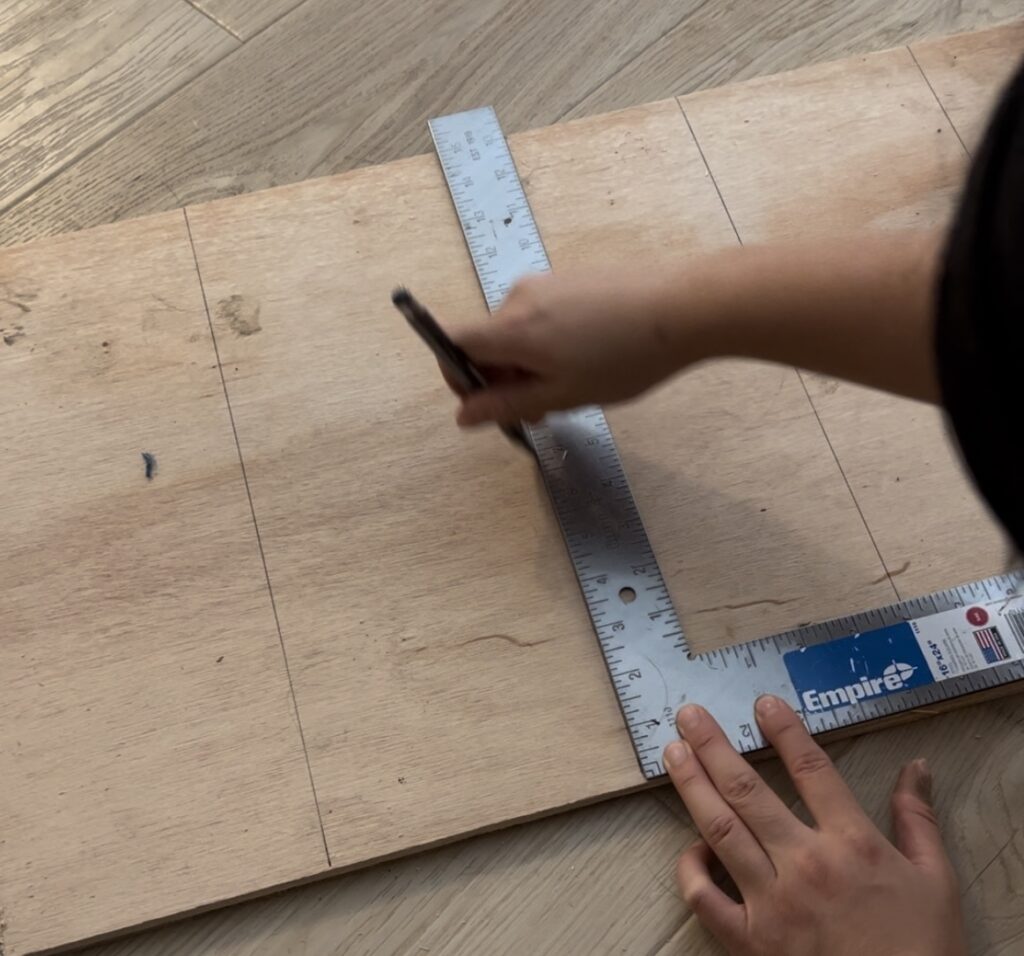
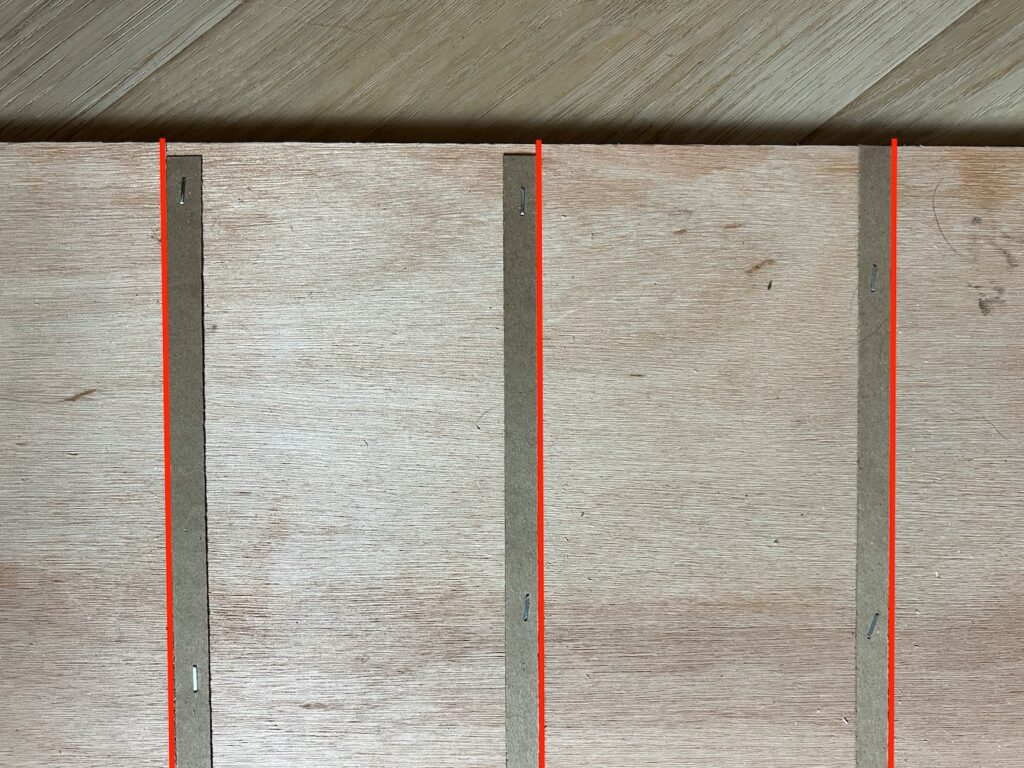
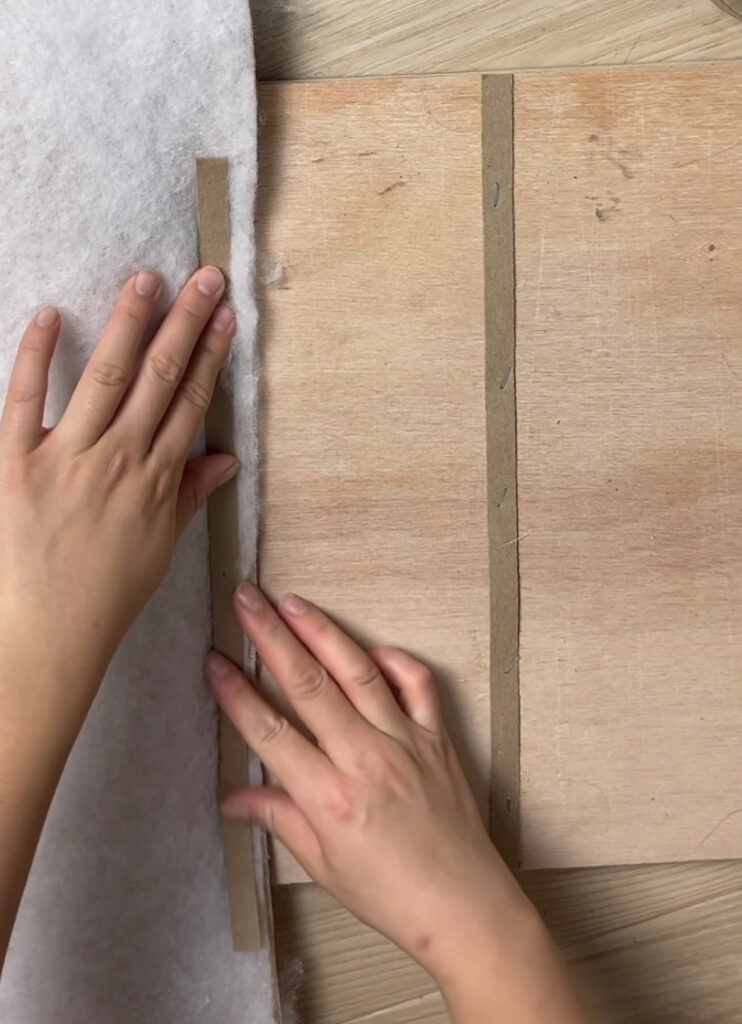
Now that we have the materials prepped, we cut a 1/2″ thick sheet of plywood to size. If I’m remember correctly, I believe it was 15″ x 96″. Using a square angle ruler, I draw a line at every 5.5″ like this.
We stapled the upholstery tack to the plywood using an electric stapler. The upholstery tack is a thin piece of cardboard or card stock and the purpose of it is to help create a straight guide for you as you staple the fabric into place. You can use a manual stapler, but an electric stapler would probably make it a little easier and faster! For the first tack, you want to place the tack on the right side of the line you drew, and for the rest of the tacks, you will place it on the left like so.
Part 2: Upholstery
We will start by adding foam to the second channel (we will come back to finish the first channel at the end). Spray the adhesive to the plywood and the back of the foam. Put the foam in place (it should cover the left and right tacks). Then cover the foam with a layer of batting and fabric.
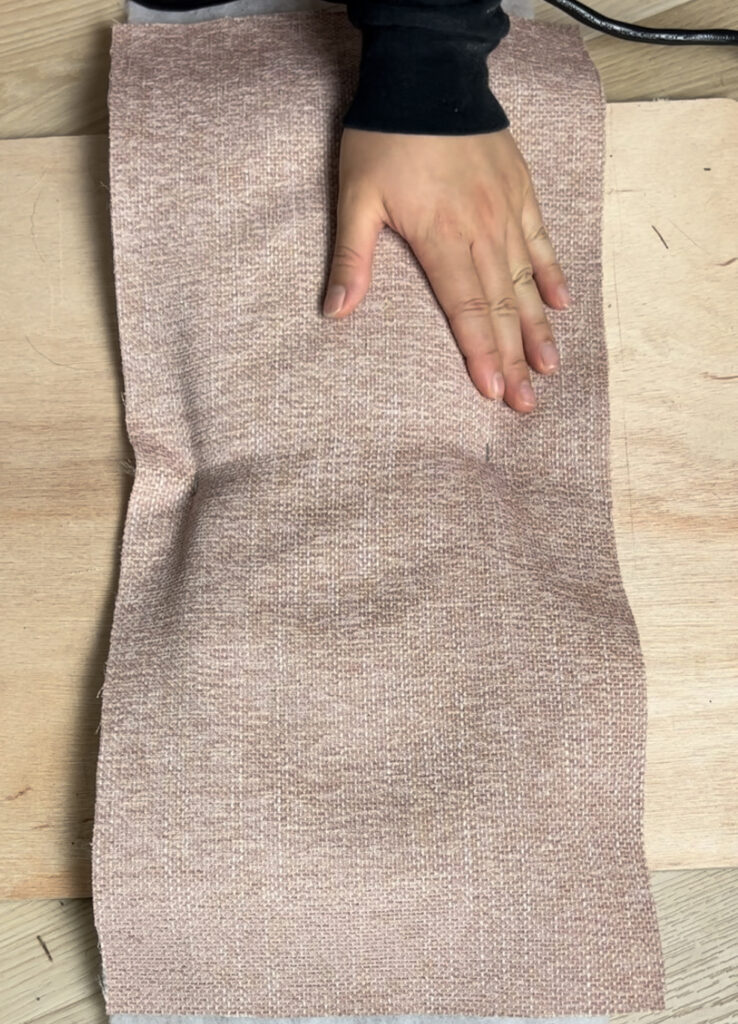
Next you want to smoothen the fabric and apply a staple in the middle on the left and right side of the upholstery tack. You should be able to feel for the tack under the fabric. Apply staples up and down both sides in an alternating fashion. Make sure not to staple too close to the foam, instead just staple at the edge of the tack.
To prepare for the second channel, cut the excess fabric from the first channel like so.

Lay a layer of the fabric and batting upside down to the previous channel. Then add a tack strip right on top, this will help keep the fabric for the next channel nice and tight. Make sure to apply lots of staples on this step otherwise the fabric will create ridges once pulled tight.
Tip: You want to measure and make sure the the distance from the left side of the tack and the left side of the next tack is the same distance you started with. For example, mine should measure 5.5”. This will help ensure your channels are straight all the way across.
Next, adhere the foam to the plywood and flip the fabric over. Continue to staple into place repeating the steps above.
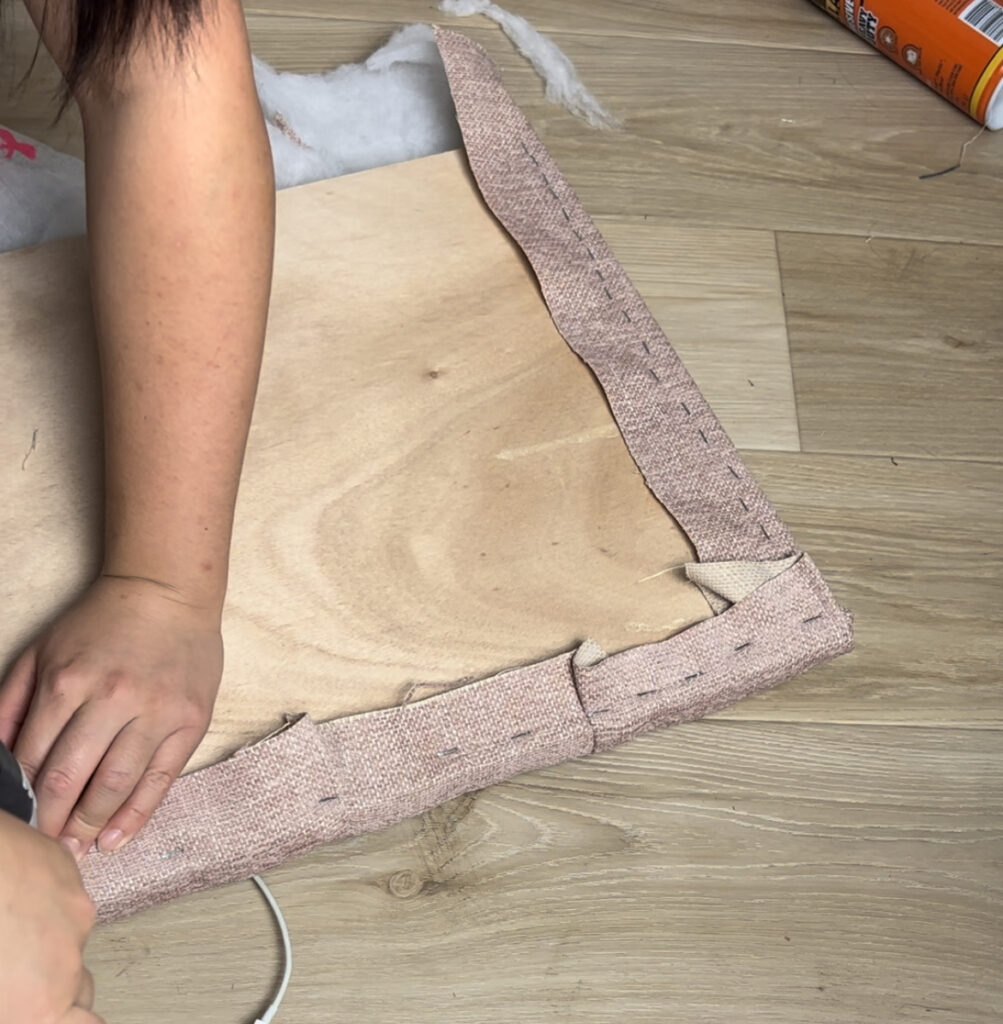
Once you are done with all the channels, we will move back and finish it off with the first channel. You complete it the same way except in reserve direction. You will then wrap the excess around the board and staple the rest in the back.
Now we have to staple the top and bottom. This part is pretty easy, simply fold it over and staple. You want to make sure anywhere where there are multiple layers, to fold neatly so that it’s not too thick in some areas.
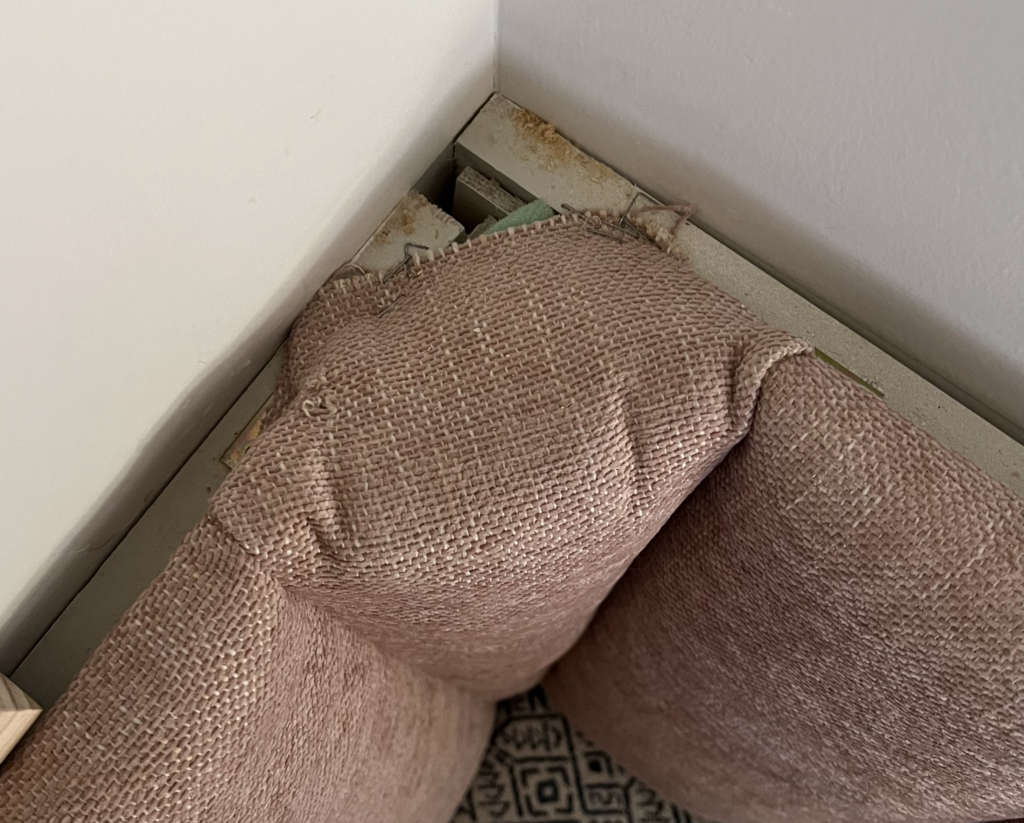
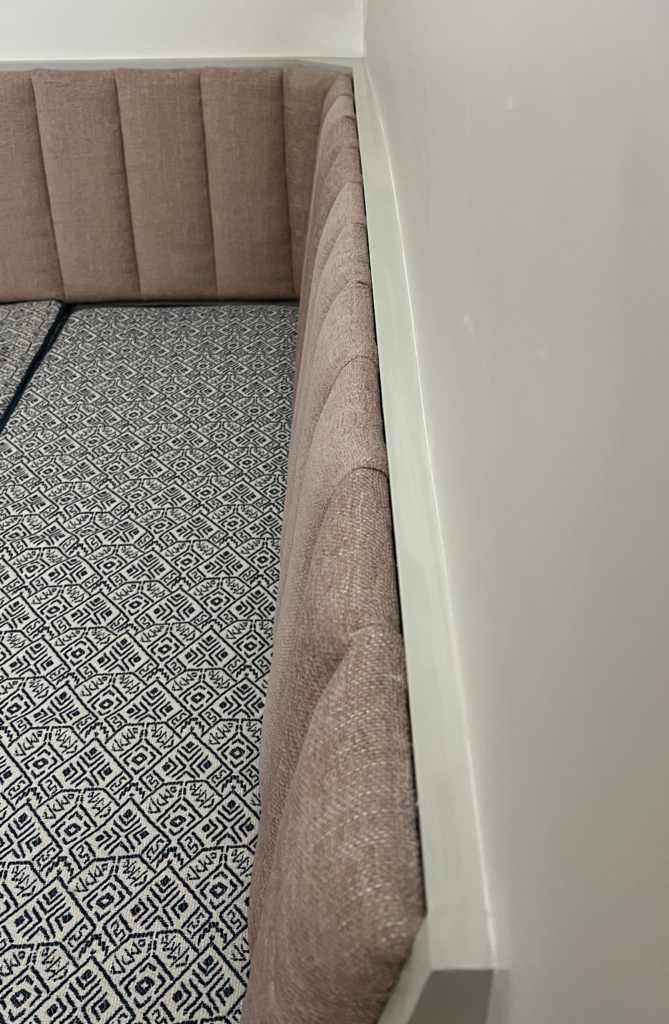
Since our banquette has a corner, I had to figure out how to add a corner channel. I am going to try to do my best at explaining this section. I stapled a piece of fabric and batting at an angle on the left side like so.
You basically want to create an inverted triangle. So I carefully stapled the fabric to the other backrest at an angle as well (Unfortunately, forgot to take some pictures here).
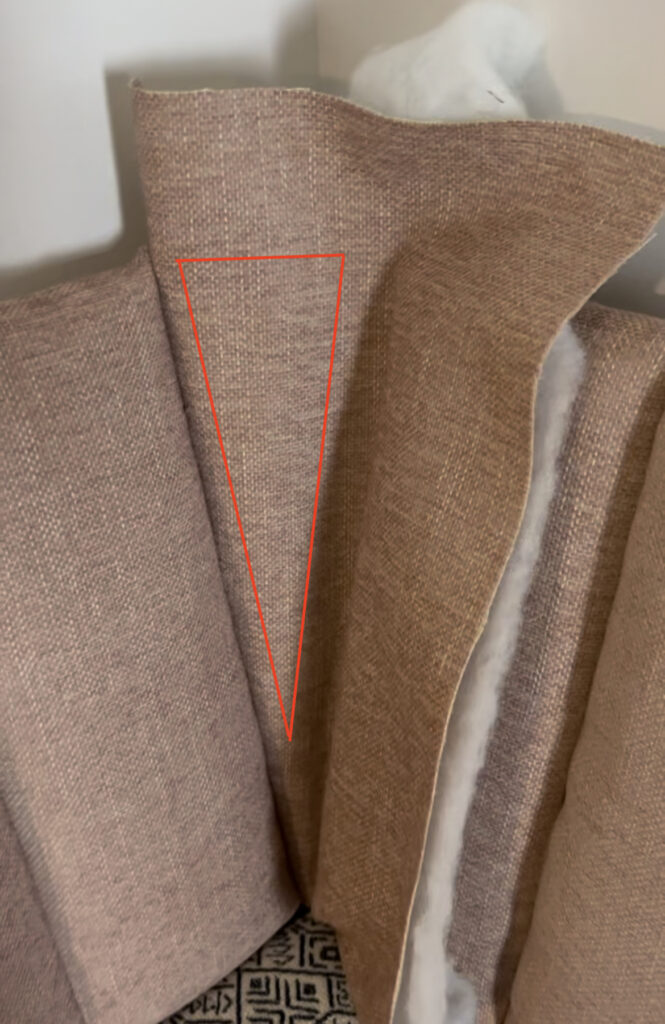
I stuffed the corner with some foam and more batting. Once it was full, I stapled the corner into place. This part was quite hard since the staple gun wouldn’t fit. From the top, it looks like this.
Part 3: Secure Backrest
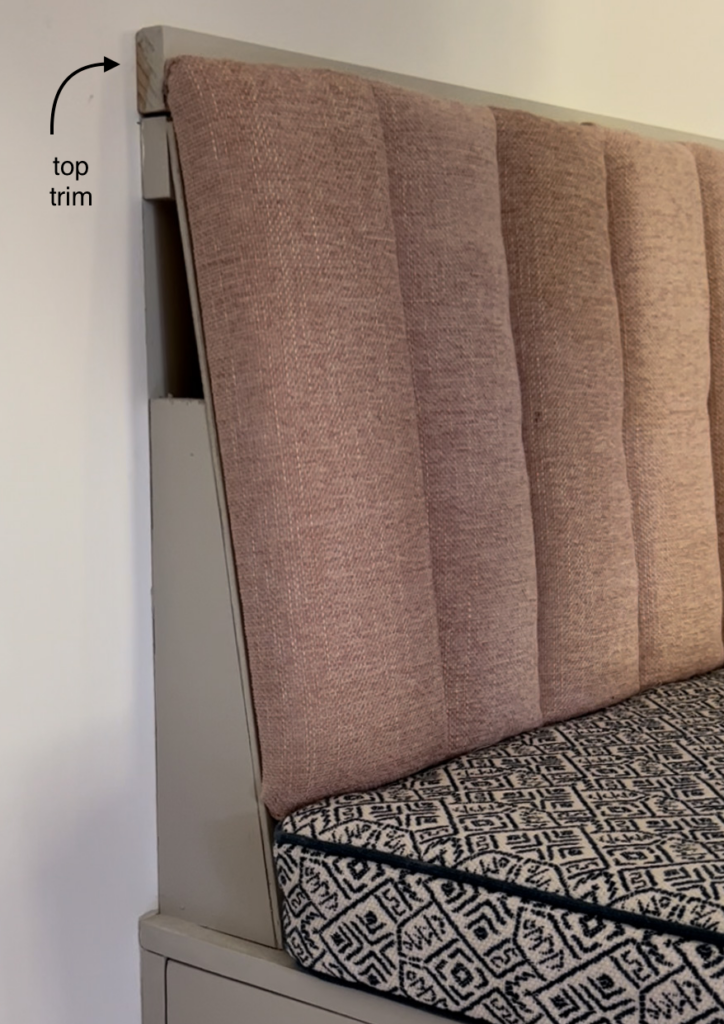
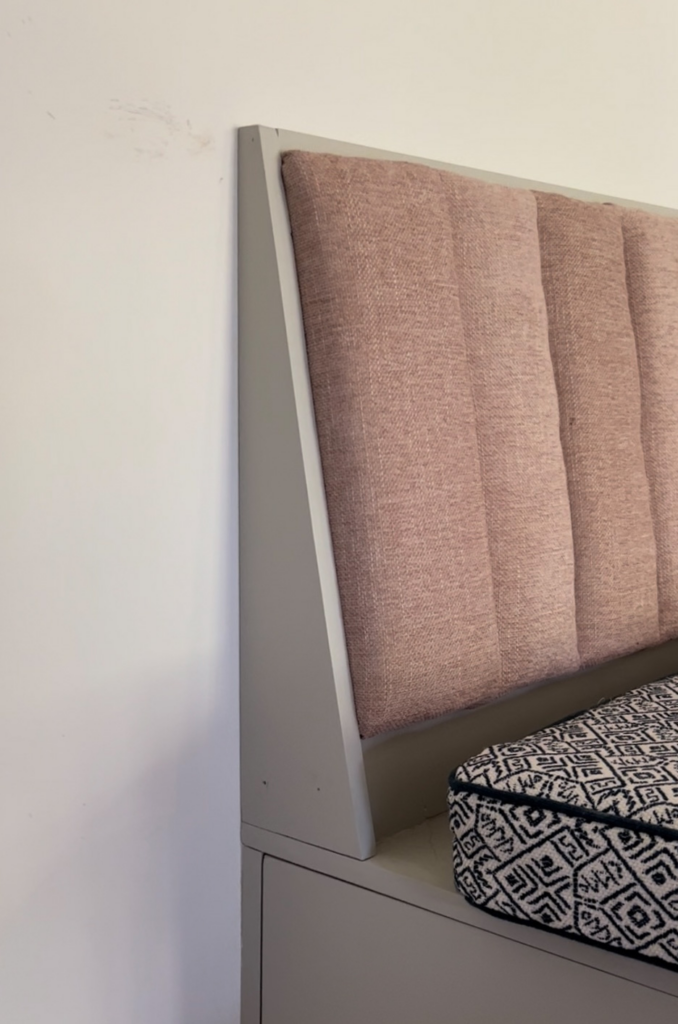
To secure the backrest to the banquette, I added these mini L brackets to the back of the backrest. I placed the L brackets about 1″ from the top of the backrest (doing it this way will allow the top trim to be partially visible once it is in place). This will make more sense in the next few pictures.
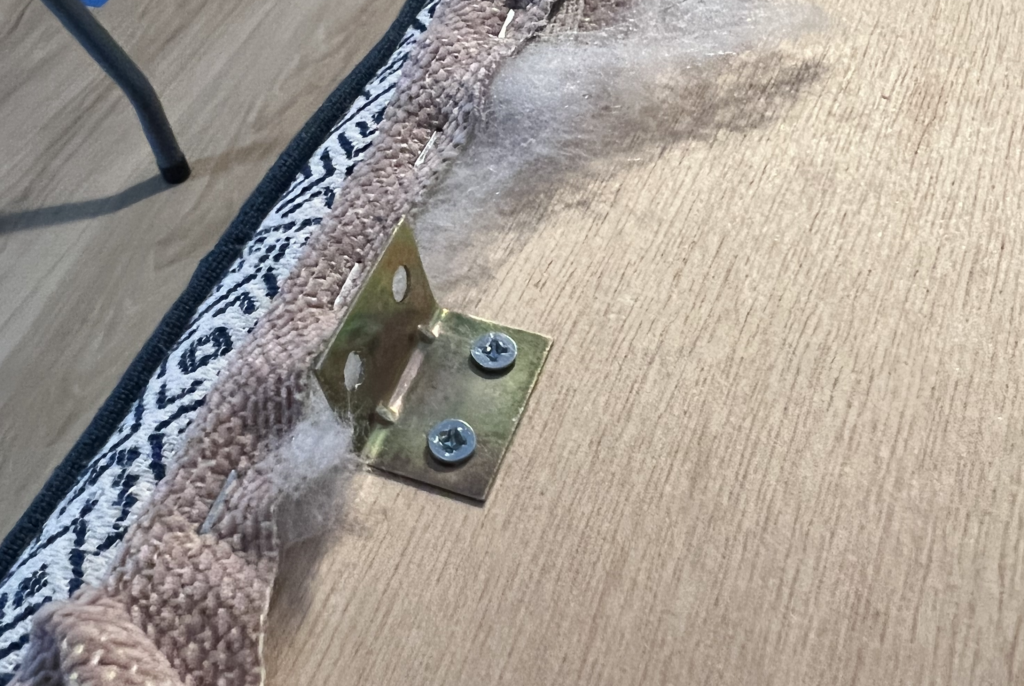
The L bracket will sit on top of the back of the banquette and screwed in from the top.
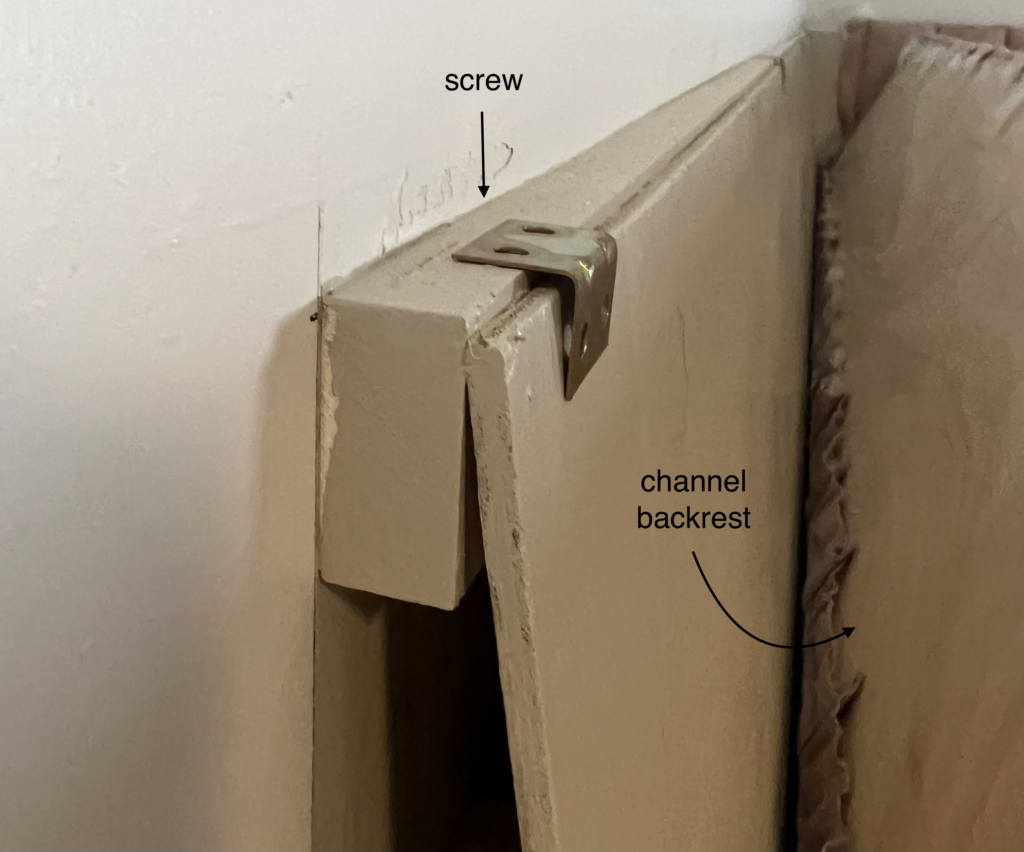
In the corner, I added a 3/4″ block so that I can add another 3/4″ triangle piece on top. The two 3/4″ pieces will create a height of 1 1/2″ to be flush with the 1×2 in put in place in the next step.
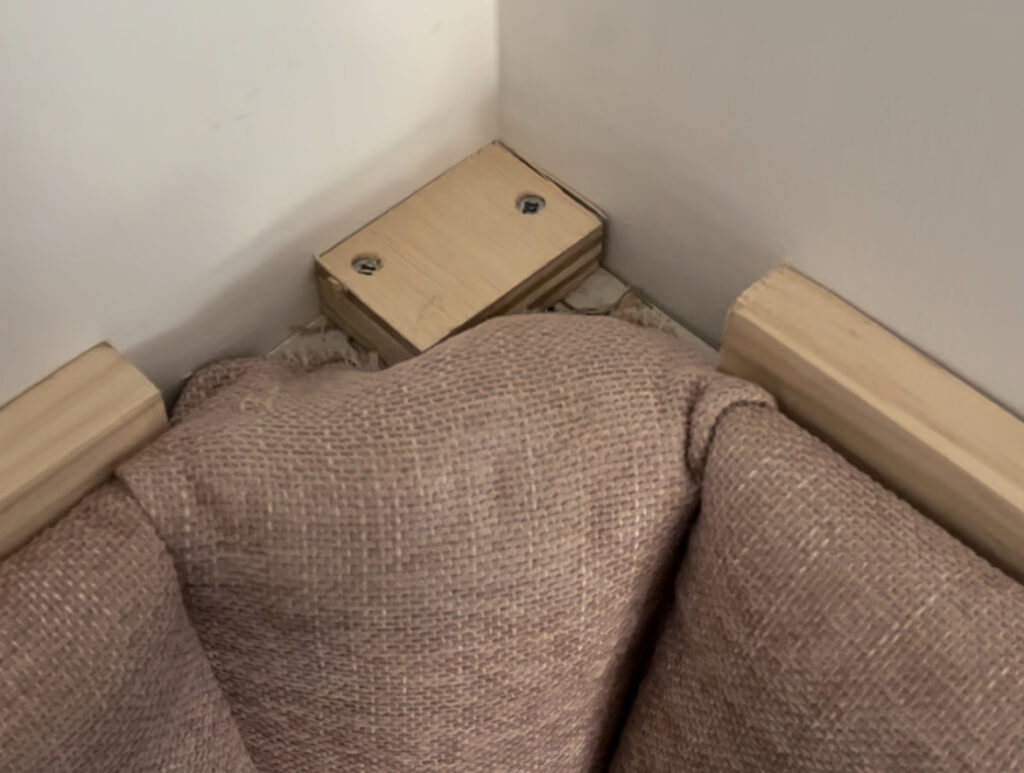
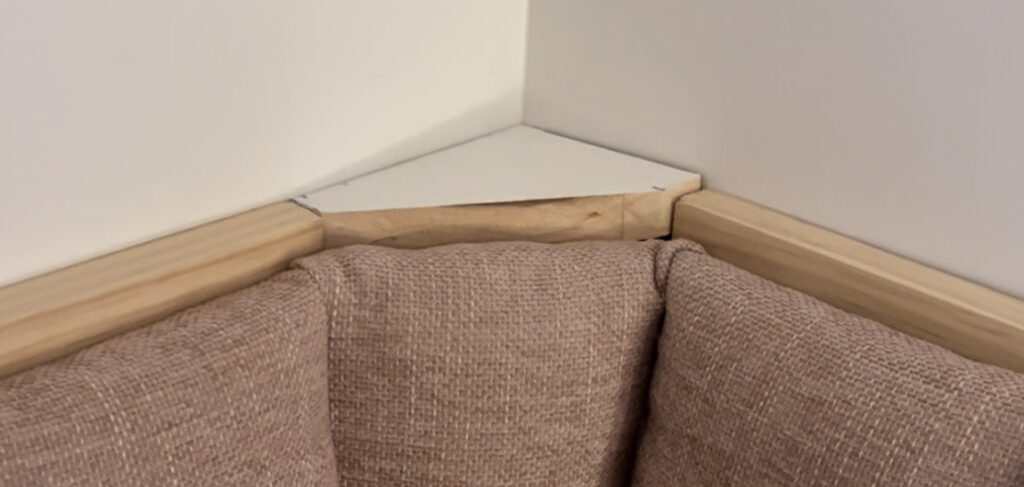
Next I added a piece of 1×2 from the top to cover the L brackets. The actual size of the 1×2 is 3/4″ x 1 1/2″ so about 1/2″ of the trim will be visible. The side profile looks like this.
Since it is a L shaped banquette, we had to repeat this on the other side. However, our wall was very bowed (yay old houses). So to fix that, we added shims, wood, and cardboard to fill the gap. Then I filled it with two coats of joint compound.

Once it was dry, I sanded, caulked, and painted. You can’t even tell – what gap?!
Alright, now for the final step, we added the end cap pieces cut from 3/4″ pine board. I didn’t use plywood here since I would need to edgeband the edges.
If you made it all the way through this blog post, congrats! With a little bit of patience and attention to detail, you can create a channel that looks like it was professionally done. Let me know if you have any questions in the comments, or send me a DM on Instagram!


I like this method so much better than some other others I’ve seen in my research, thanks for the tips!